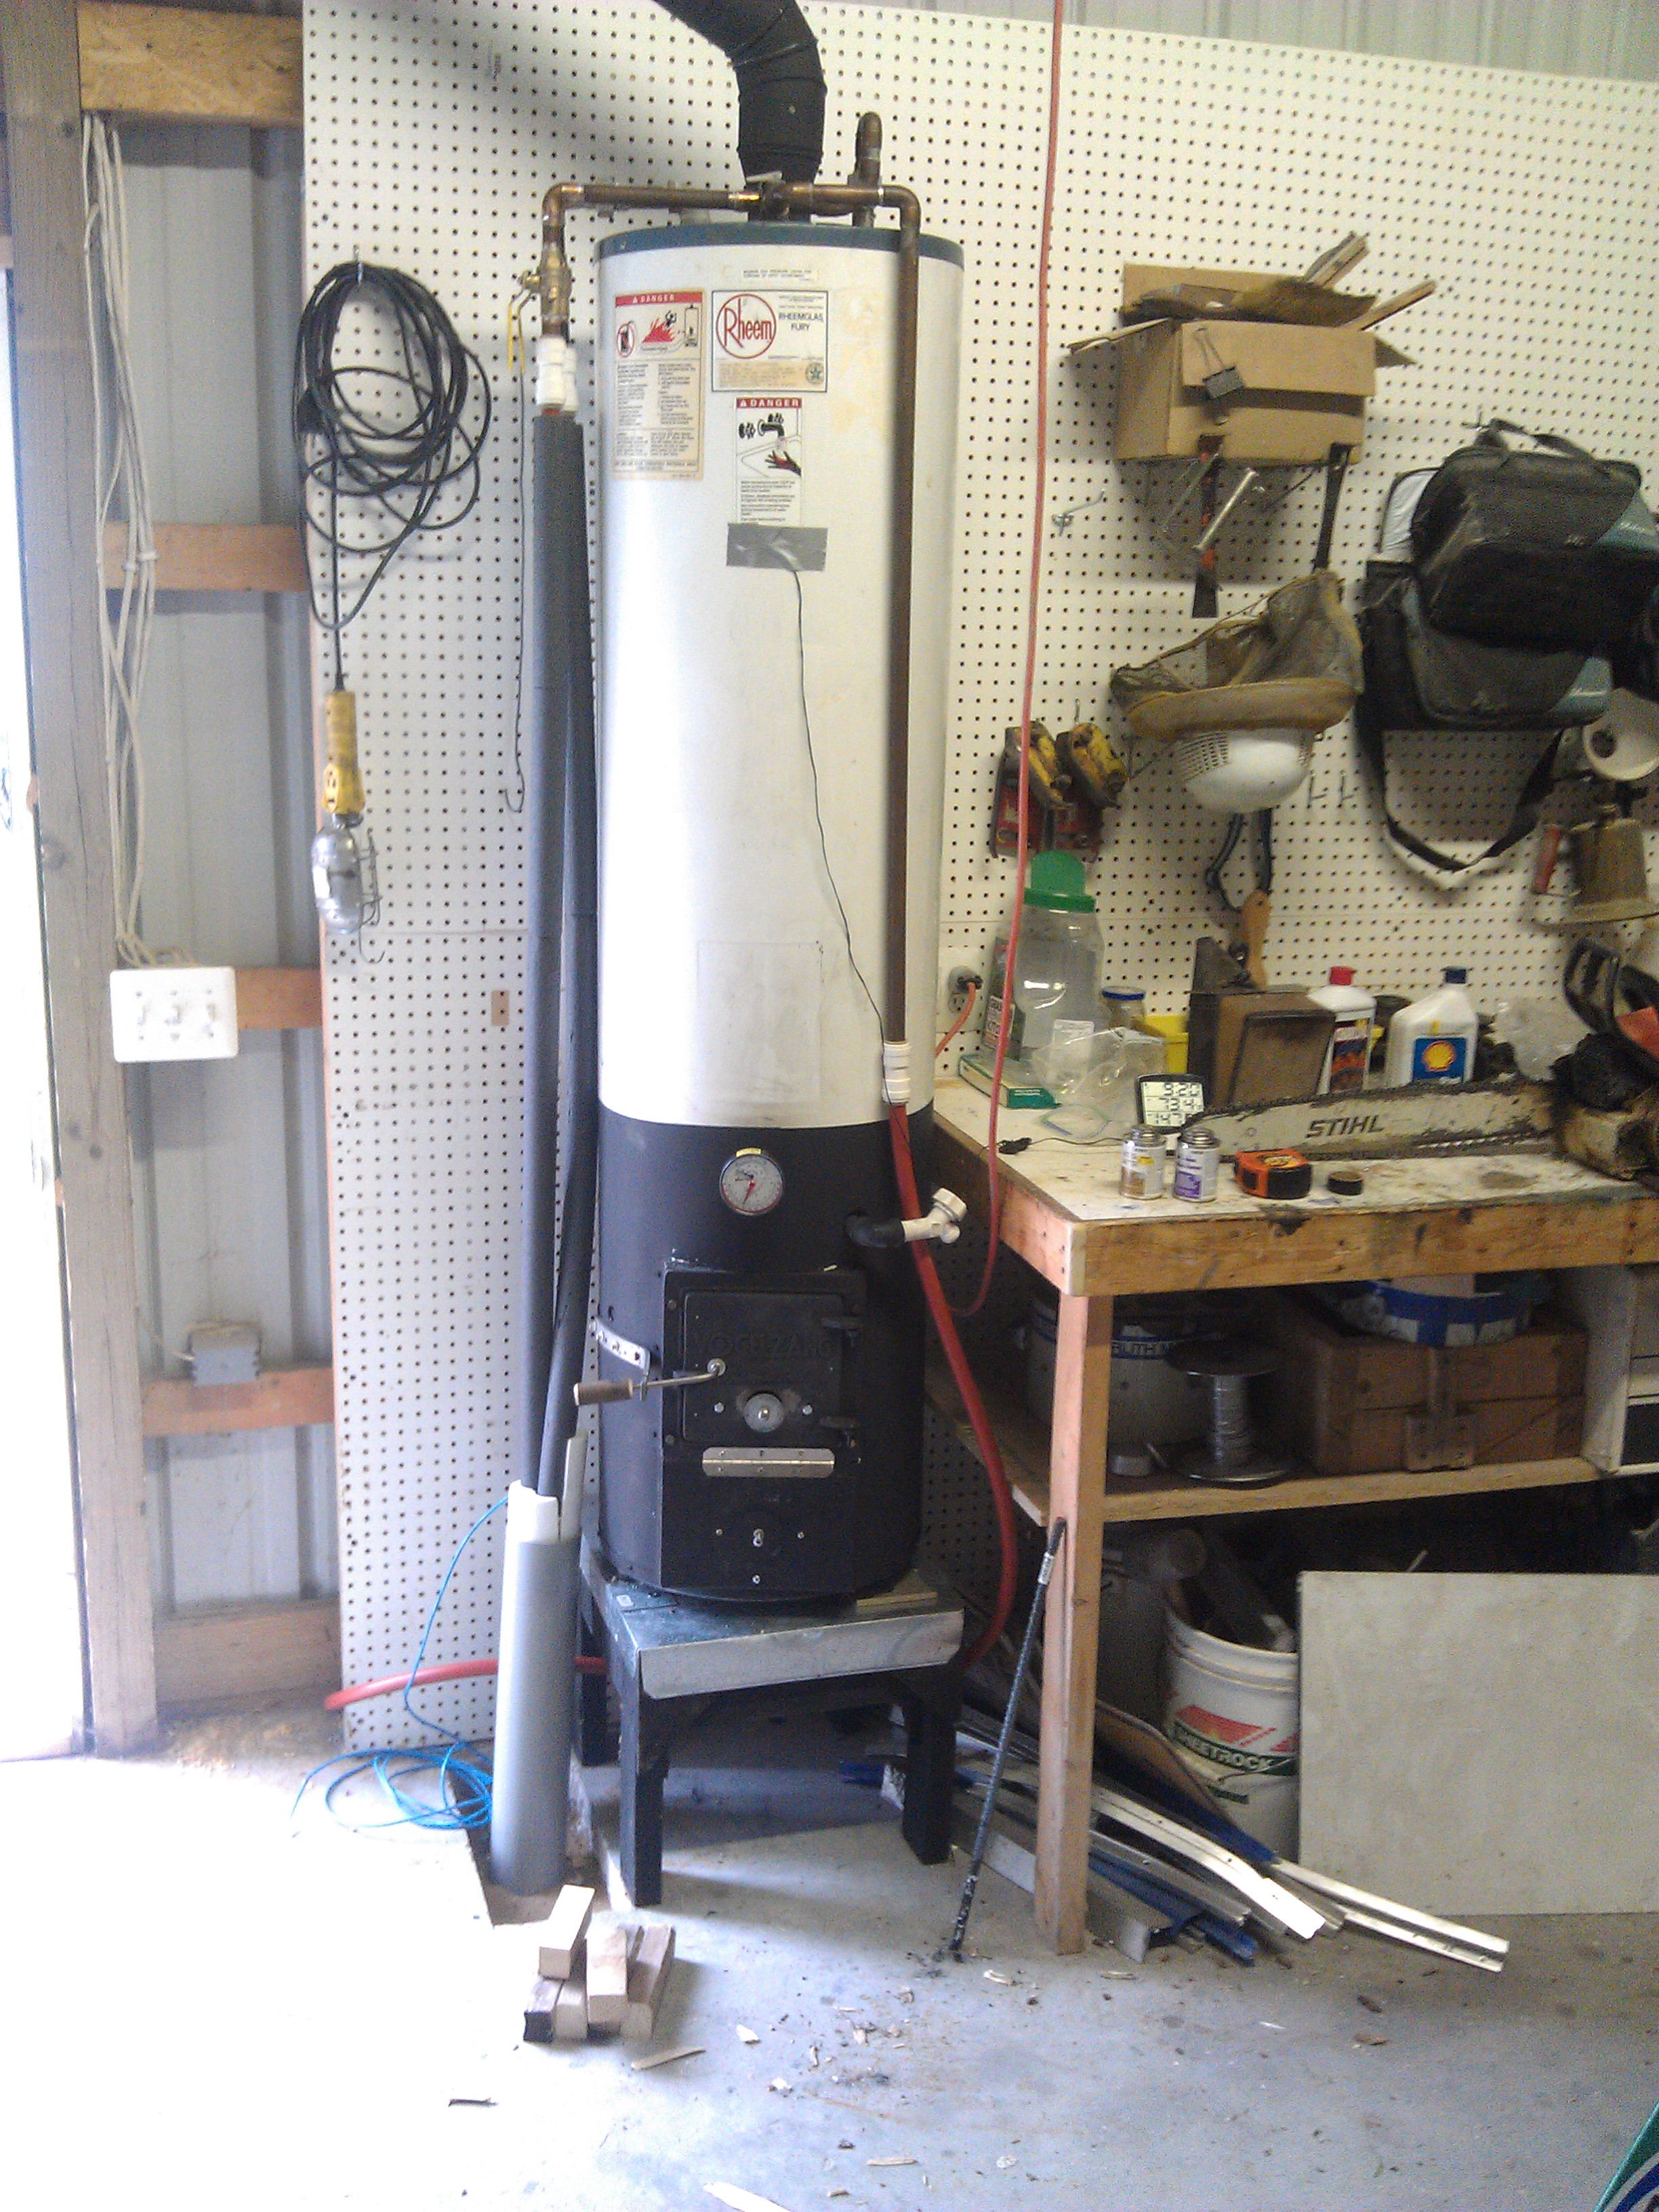
This is the details of my wood-fired water heater, converted from a natural gas water heater. Sounds dangerous doesn’t it?
The finished product of this project pictured above, of course. You can see that it’s a plain old Rheem (the gas burner and valve stripped away from the bottom) with and a firebox built on the bottom. You might think it’s a safety issue, that close to the work bench, but I carefully observed the 1″ clearances, and it is also up on a stand so that it is 18″ above the floor, as recommended for garage installation. The flue pipe is just dryer duct, and does not get hot enough to burn off the stove paint, or even the barcode stickers on the parts I didn’t paint.
This was an effort to provide an opportunity for my family to help with water heating costs. I’m told that many Amish families have these. (Whether they build themselves like this I can’t say) So I snapped a picture of the gas meter (we have metered propane) exactly where it stopped when I put the wood-fired into service:

The meter only moved off this reading a little when we went on vacation, as we use gas only for backup.
Here’s a youtube video of it in action.
November 2012 Update: Here is a shot of the ground under which the feed and return pipes are buried. There was just a thin skiff of snow with the grass still poking through. There is no heat loss to visibly make the snow melt.

So now you’re asking what sort of insulation was the feed and return done with. This explains it best:

First I buried 4-inch grey PVC pipe as a conduit for the feed and return pipes. Then I made a BUNCH of insulating strips from white expanded polystyrene foam using my hot wire foam cutter. I made the strips to contain the pipe already inside of the black closed cell pipe insulation. This must be good stuff. There is no visible heat loss from this arrangement, although after a few hours the water in the pipe loses most of its heat.
In the above photo, I was in the process of pulling the pipe through the “conduit”. Yes, that is blue cat-5 ethernet cable there. I thought it would be a good idea to get network out there while I was going to the bother. Maybe someday I’ll put a arduino-driven temperature monitor on the wood-fired water heater. Now *that* would be a mix of high and low tech.
April 2013 Update: Here are some shots of the grates that I use in the wood fired water heater. This first shot is of the worn out grate that I put into service in August 2012.

I should maybe get some 5/8″ or 3/4″ re-bar to make the grates with. This is 1/2″ and seems too light.
Below is the new grate. I don’t expect it to last any better than the first. I welded legs onto these– the first grates sat up on some firebrick fragments.

December 30, 2013 update: The water heater continues to provide stellar performance, has been running non-stop for over 16 months now. I have replaced the grates for the 3rd time, but these are easy and inexpensive to make. This time I did use 5/8″ rebar, and welded the bars a lot closer together. Also, I’ve had some problems with the supply pipes freezing, but that’s no fault of the heater itself. I also built an arduino-powered temperature monitoring interface that shows the water temperature in two places on the tank, as well as a thermocouple in the chimney that senses the fire status. It’s a web interface so I can check the status from anywhere!