Pine strip, not cedar strip, kayak
This is the first boat-building post to show up on my site, but it’s actually the third kayak I’ve built. The first two were “one-sheet” plywood stitch and glue kayaks, each 92 inches in length. This boat will be just short of twelve feet. It is made of pine, cut from a wide board to get a nice quarter-sawn grain.UPDATE: I’m nearly finished, and have already had this kayak in the water! (It was an exciting moment)
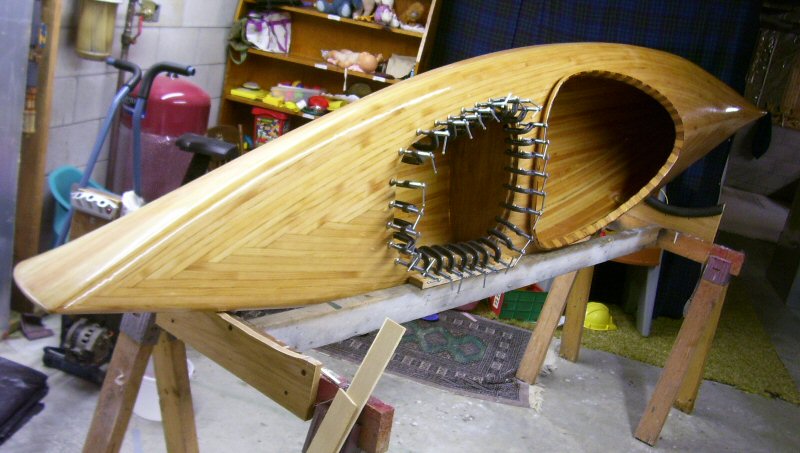
Here’s the current status of things as of November 12, 2010. I’m nearly finished. The kayak is at a really fun stage in the build process, and I’ve actually had it out and paddled around in a lake nearby. It performed exceptonally well, I thought, and the modifications that I made to the design did what I wanted them to do.I have all the major glassing done, stem and stern pieces done, coaming done. Here in these photos, I’m expoxying/clamping the lip for the aft hatch seal. There will be a hatch in the front as well, but I might not get that done before I take the kayak on a camping trip in a week or so. I also hope to get the deck varnished for the trip, but I’m not too concerned because there isn’t much sun this time of year, and the epoxy could really take a bit of UV to help it cure.
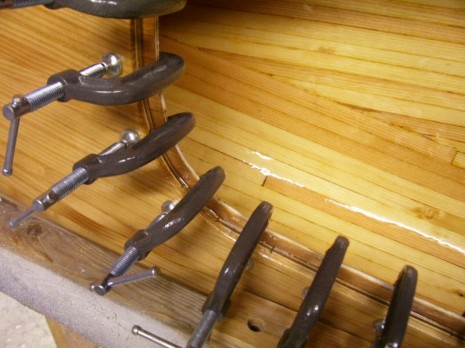
Closeup, clamping hatch seal lip
This
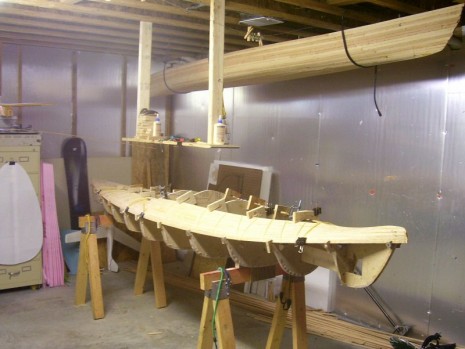
is current progress as of March 19, 2009. I have the hull finished,
and a good start on the deck. I’ve reached the point where I can begin
leaving a void in the center where the cockpit will be cut out.I’m now using the no-staple clamping method that’s detailed on at Green Valley Boat Works. It’s a winner. It’s much faster than the “wooden chain” method described later on this page. Maybe I’ll get this boat done before summer!
I’m back to using stretchy things to help clamp the strips. It just works extremely well. I switched from lots of little bungie cords, to a 10 foot long piece of surgical tubing. Faster. If you’ve ever built a strip canoe or kayak, you know why speed (or should I say slowness) is a frustration.
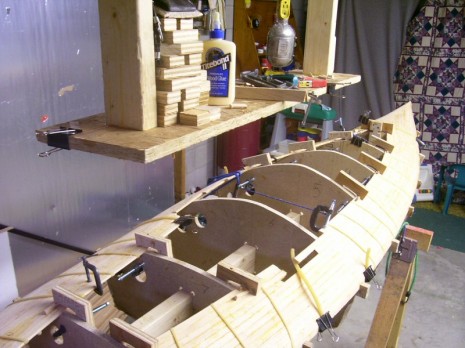
The wooden plywood clamping jigs were cheap (free, actually, the 3/4″ plywood was recycled) and easy to make, can be quickly and easily moved, and they keep the strips under control while you’re sliding them into place just before clamping. In the (very few) spots where the hull wants to pull away from the form, then I just glue a little block on the inside, and after the glue dries, just force the erring section back tight against the form and clamp (or screw) the block to the station.
Kayak deck, in the jig,
hull finished
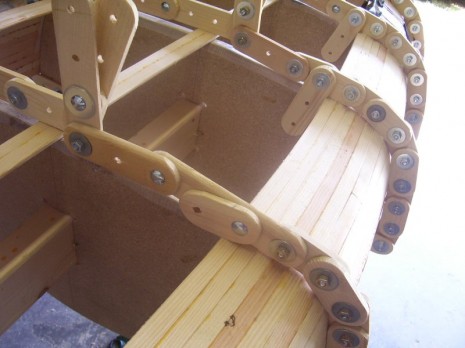
This earlier clamping method is 100% Dan’s Workshop original. I started out by holding the strips against the forms with bungee cords. This worked very nicely until I got around the chine.There were two problems I solved with the “wooden chain” clamping method: 1. Bungees would not keep the shape of already glued strips, they allowed “pinched” areas at stern and bow to bulge away from the form. 2. Bungees deformed the strips between stations (forms) because they pulled down rather than in the direction that clamping pressure is needed.
You may ask, “why not just staple the strips to the forms?” I don’t want all those unsightly staple holes. A boat full of holes is not a good thing. (Also the light colored pine would *really* make the holes show.) The wooden chains flex to the shape of the hull, and then rigidly keep the shape when each link is tightened. The links can even be glued for better shape permanence.
This is the first strip-built kayak for me, so it’s an experiment beginning to end. I started out doing bevel joints, and now I’m doing cove and bead. I plan to switch back to bevel at earliest convenience. Cove and bead seems like a lot of nonsense, it really tears up the edges of the strips on the cove side and doesn’t improve alignment as much as I thought it should.
Another thing I intend to use the wooden chain for is to copy the shape of the hull interior to make a bulkhead pattern.
Kayak strip clamping mechanism, now obsolete
