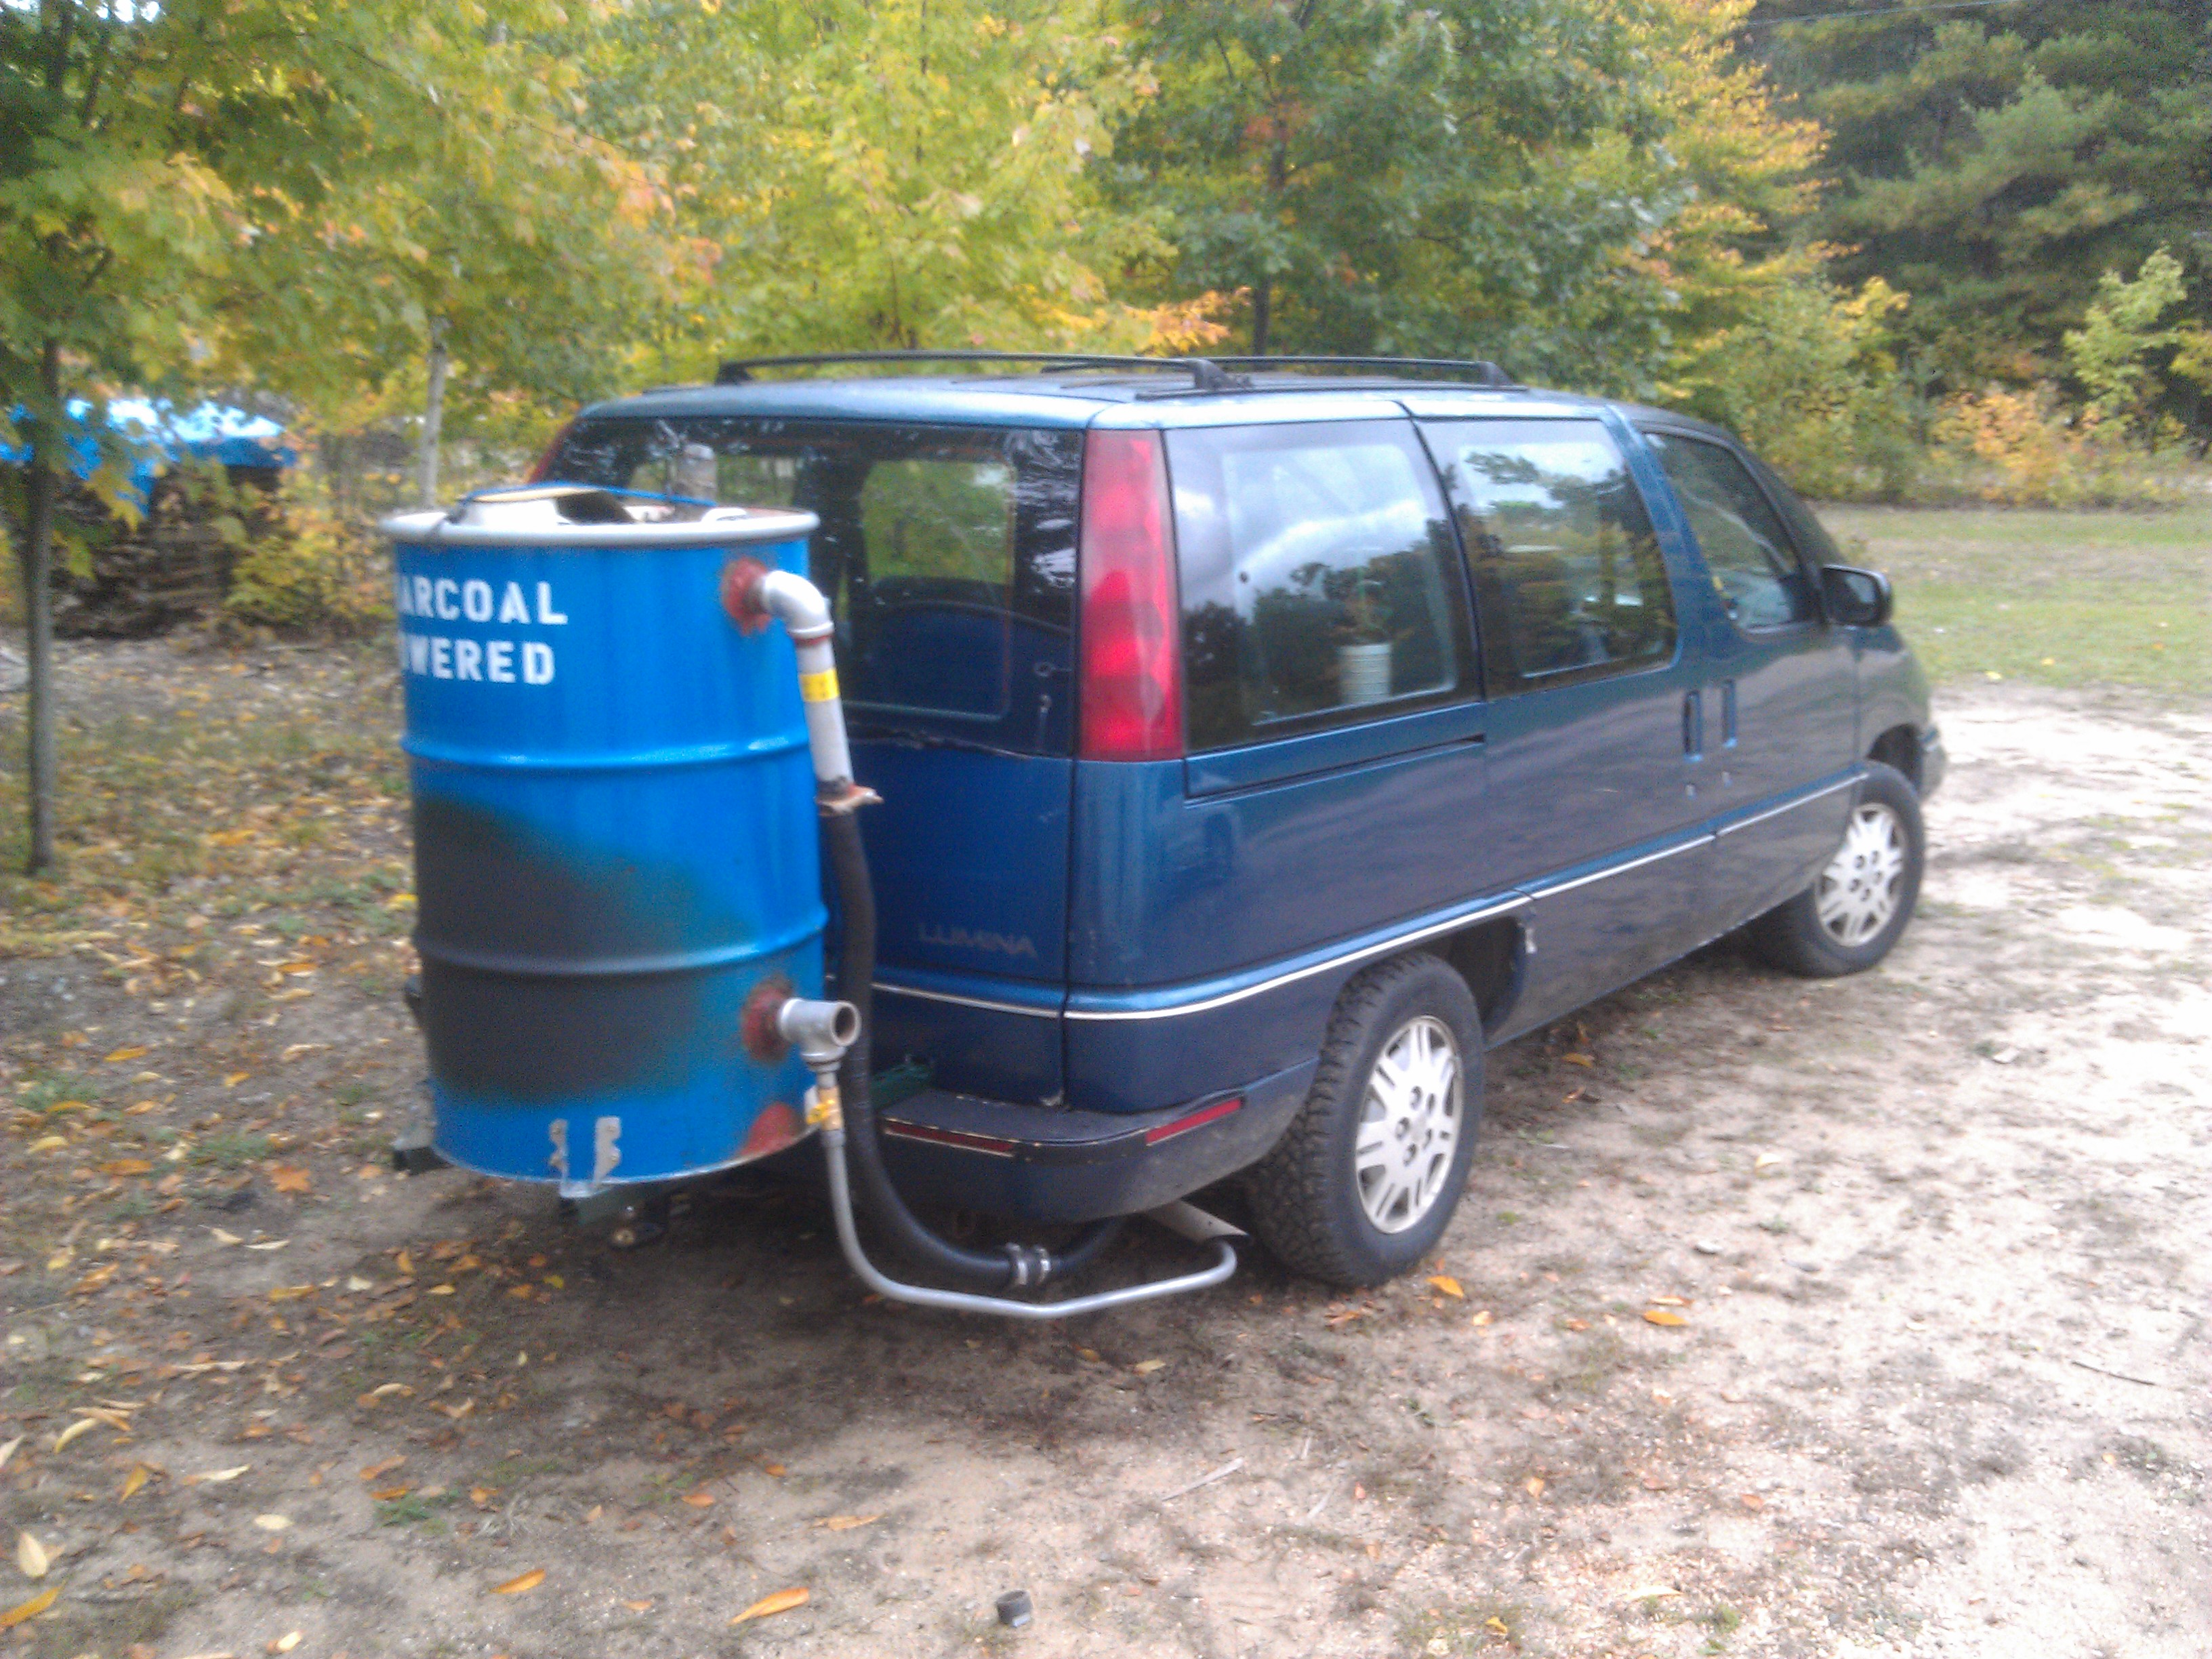
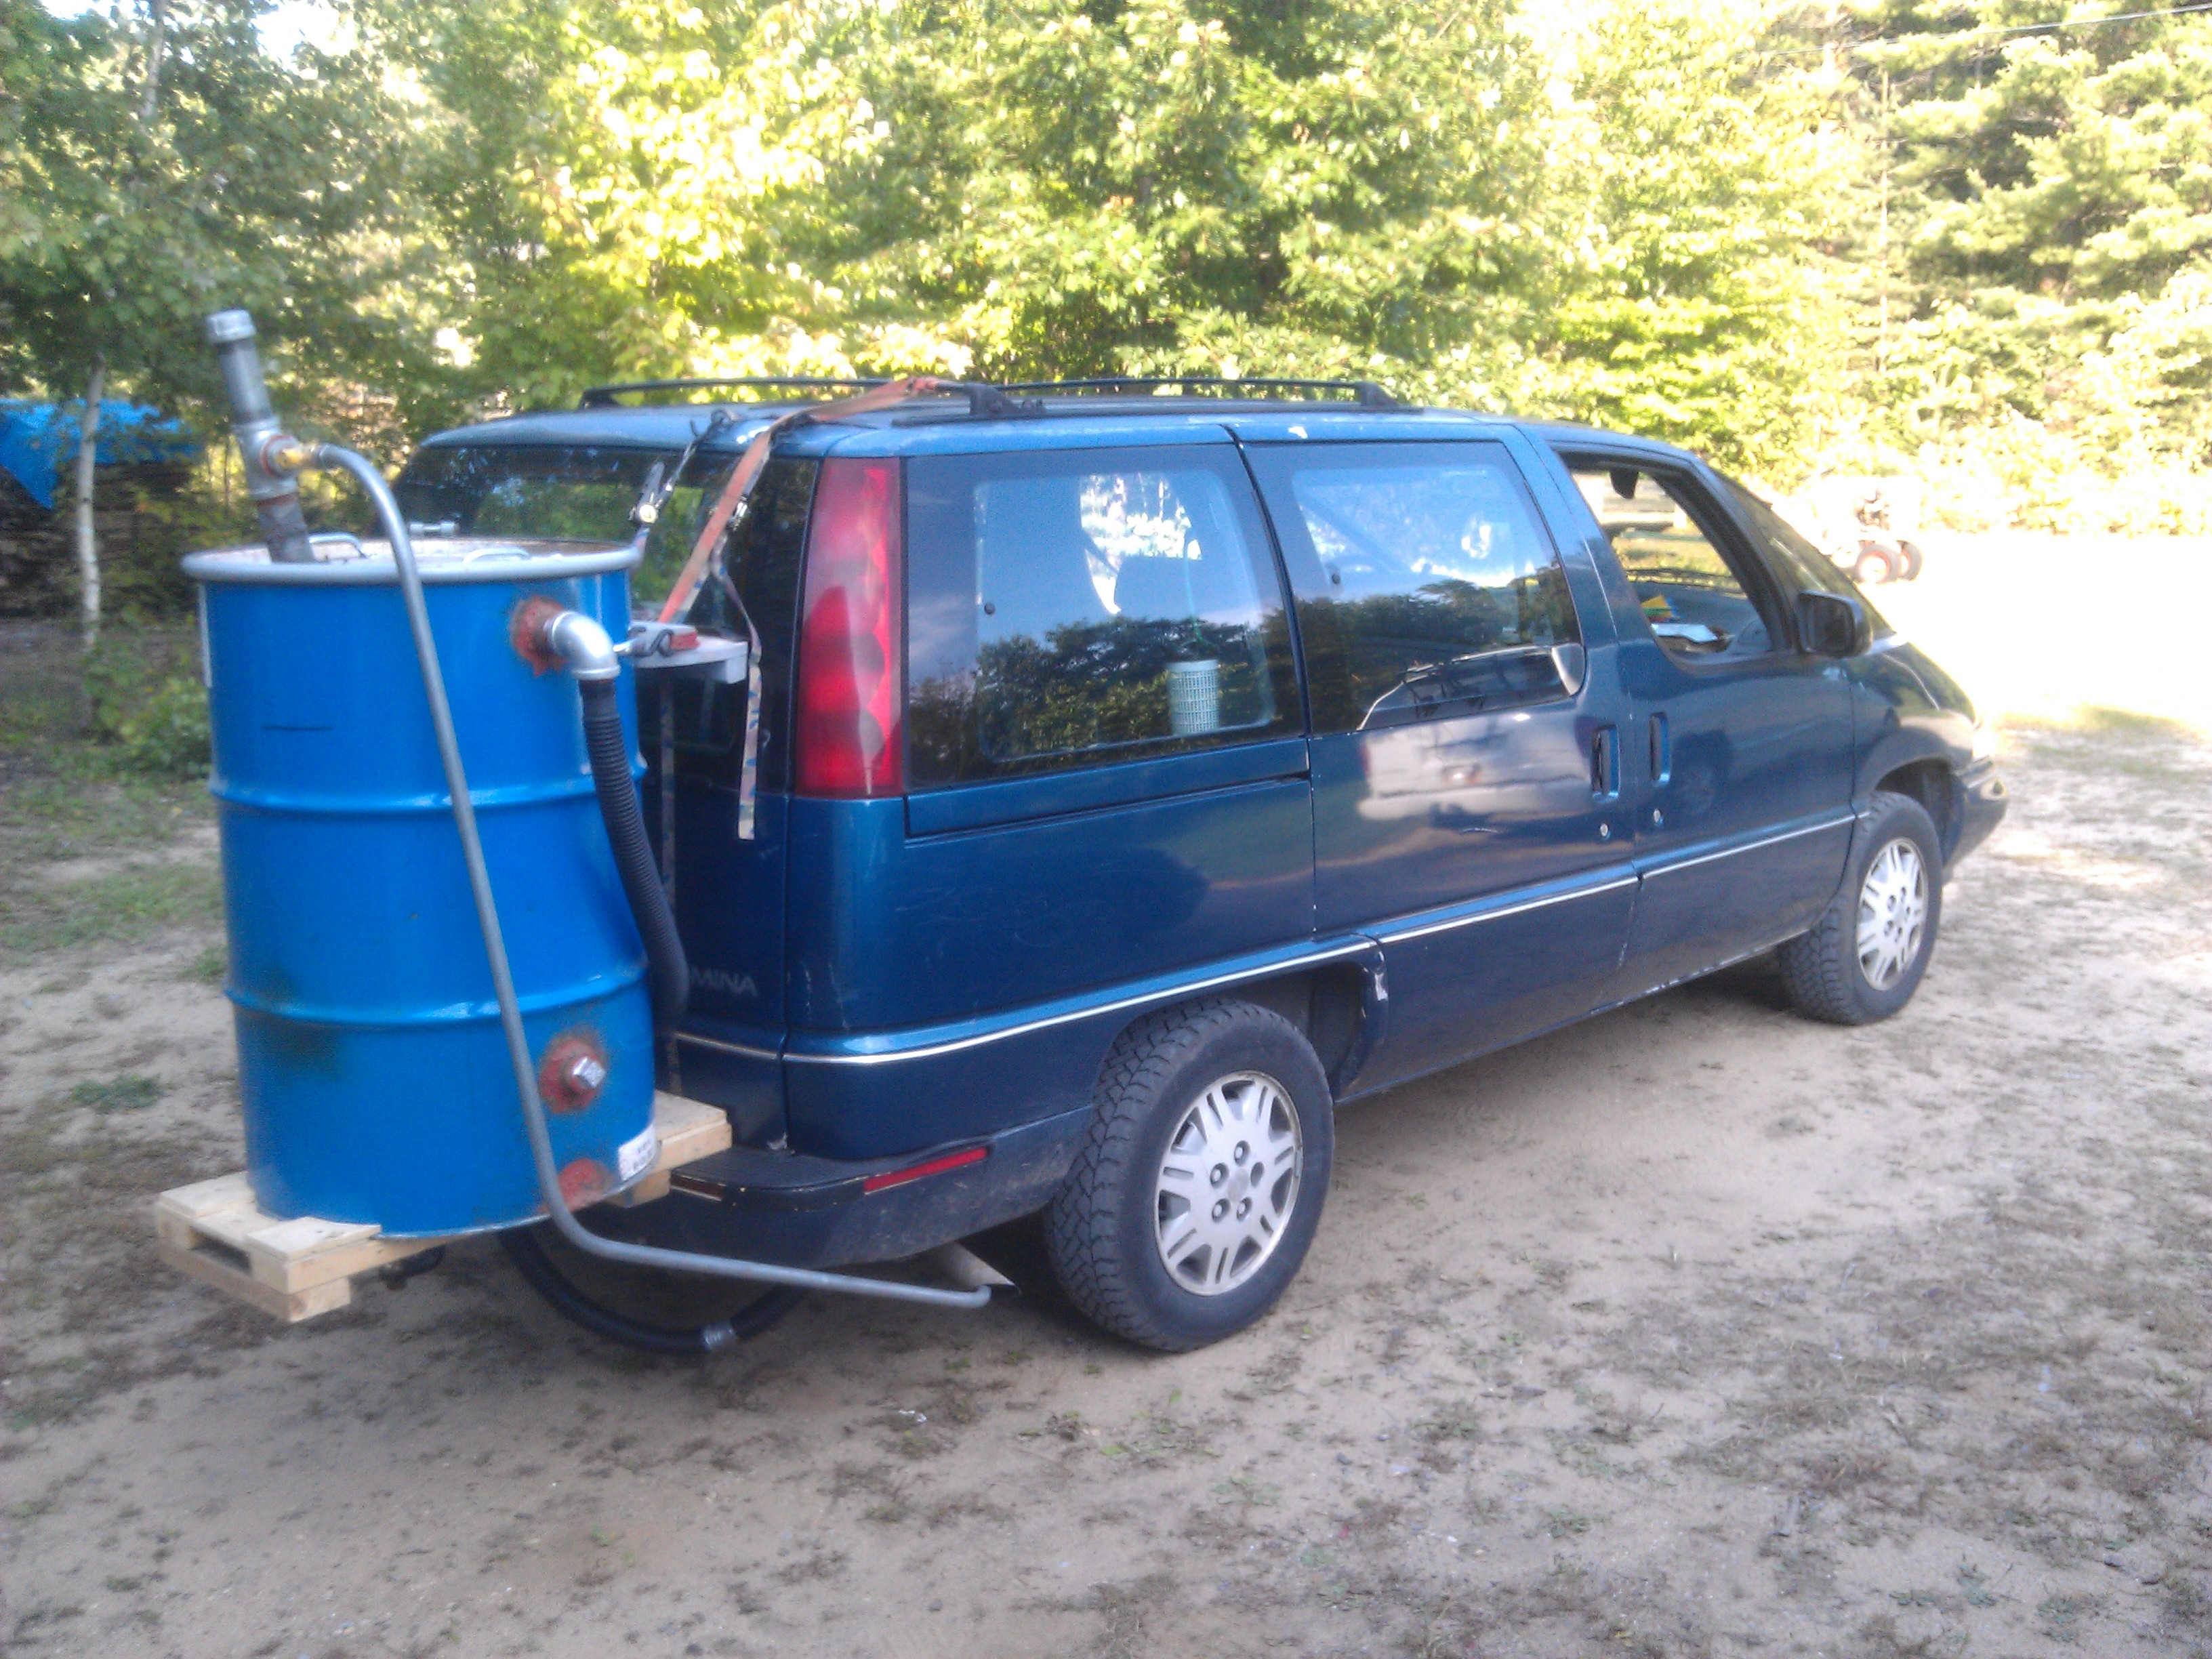
Here are pics of my 1991 Chevy Lumina APV minivan which I added on a charcoal gasifier. This has a 3.1L V6, with throttle body fuel injection. It still runs on gasoline too!
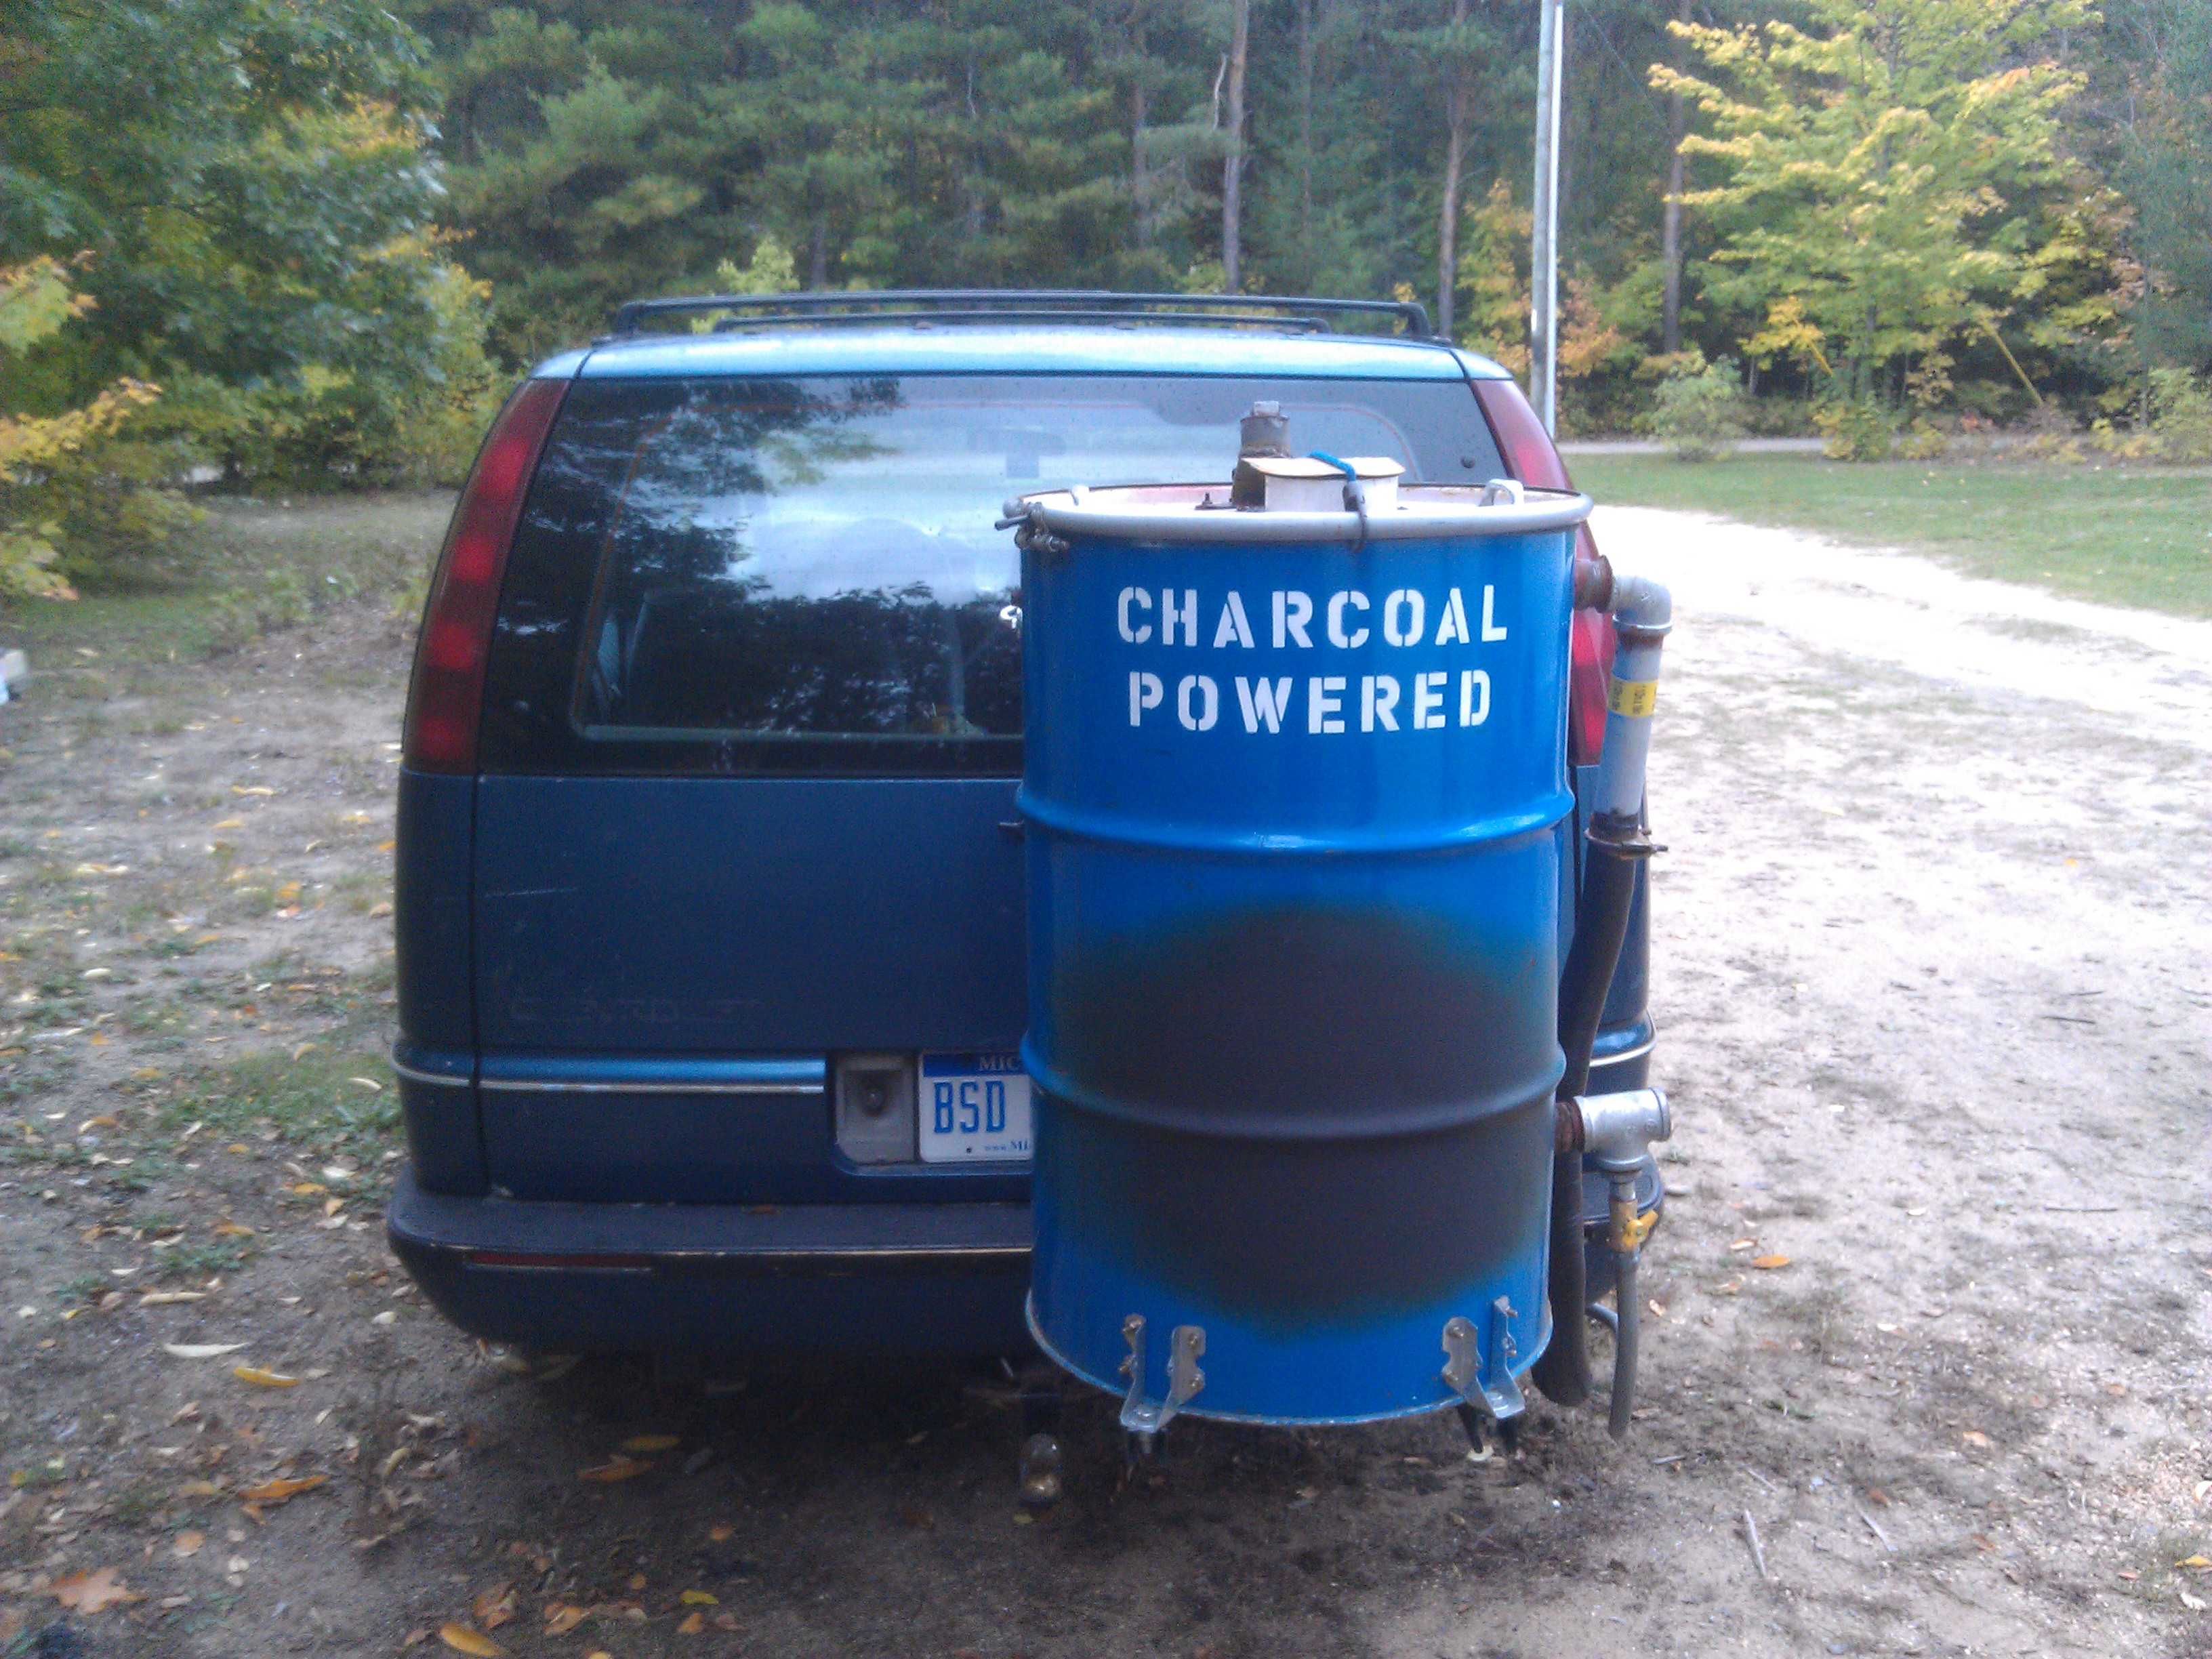
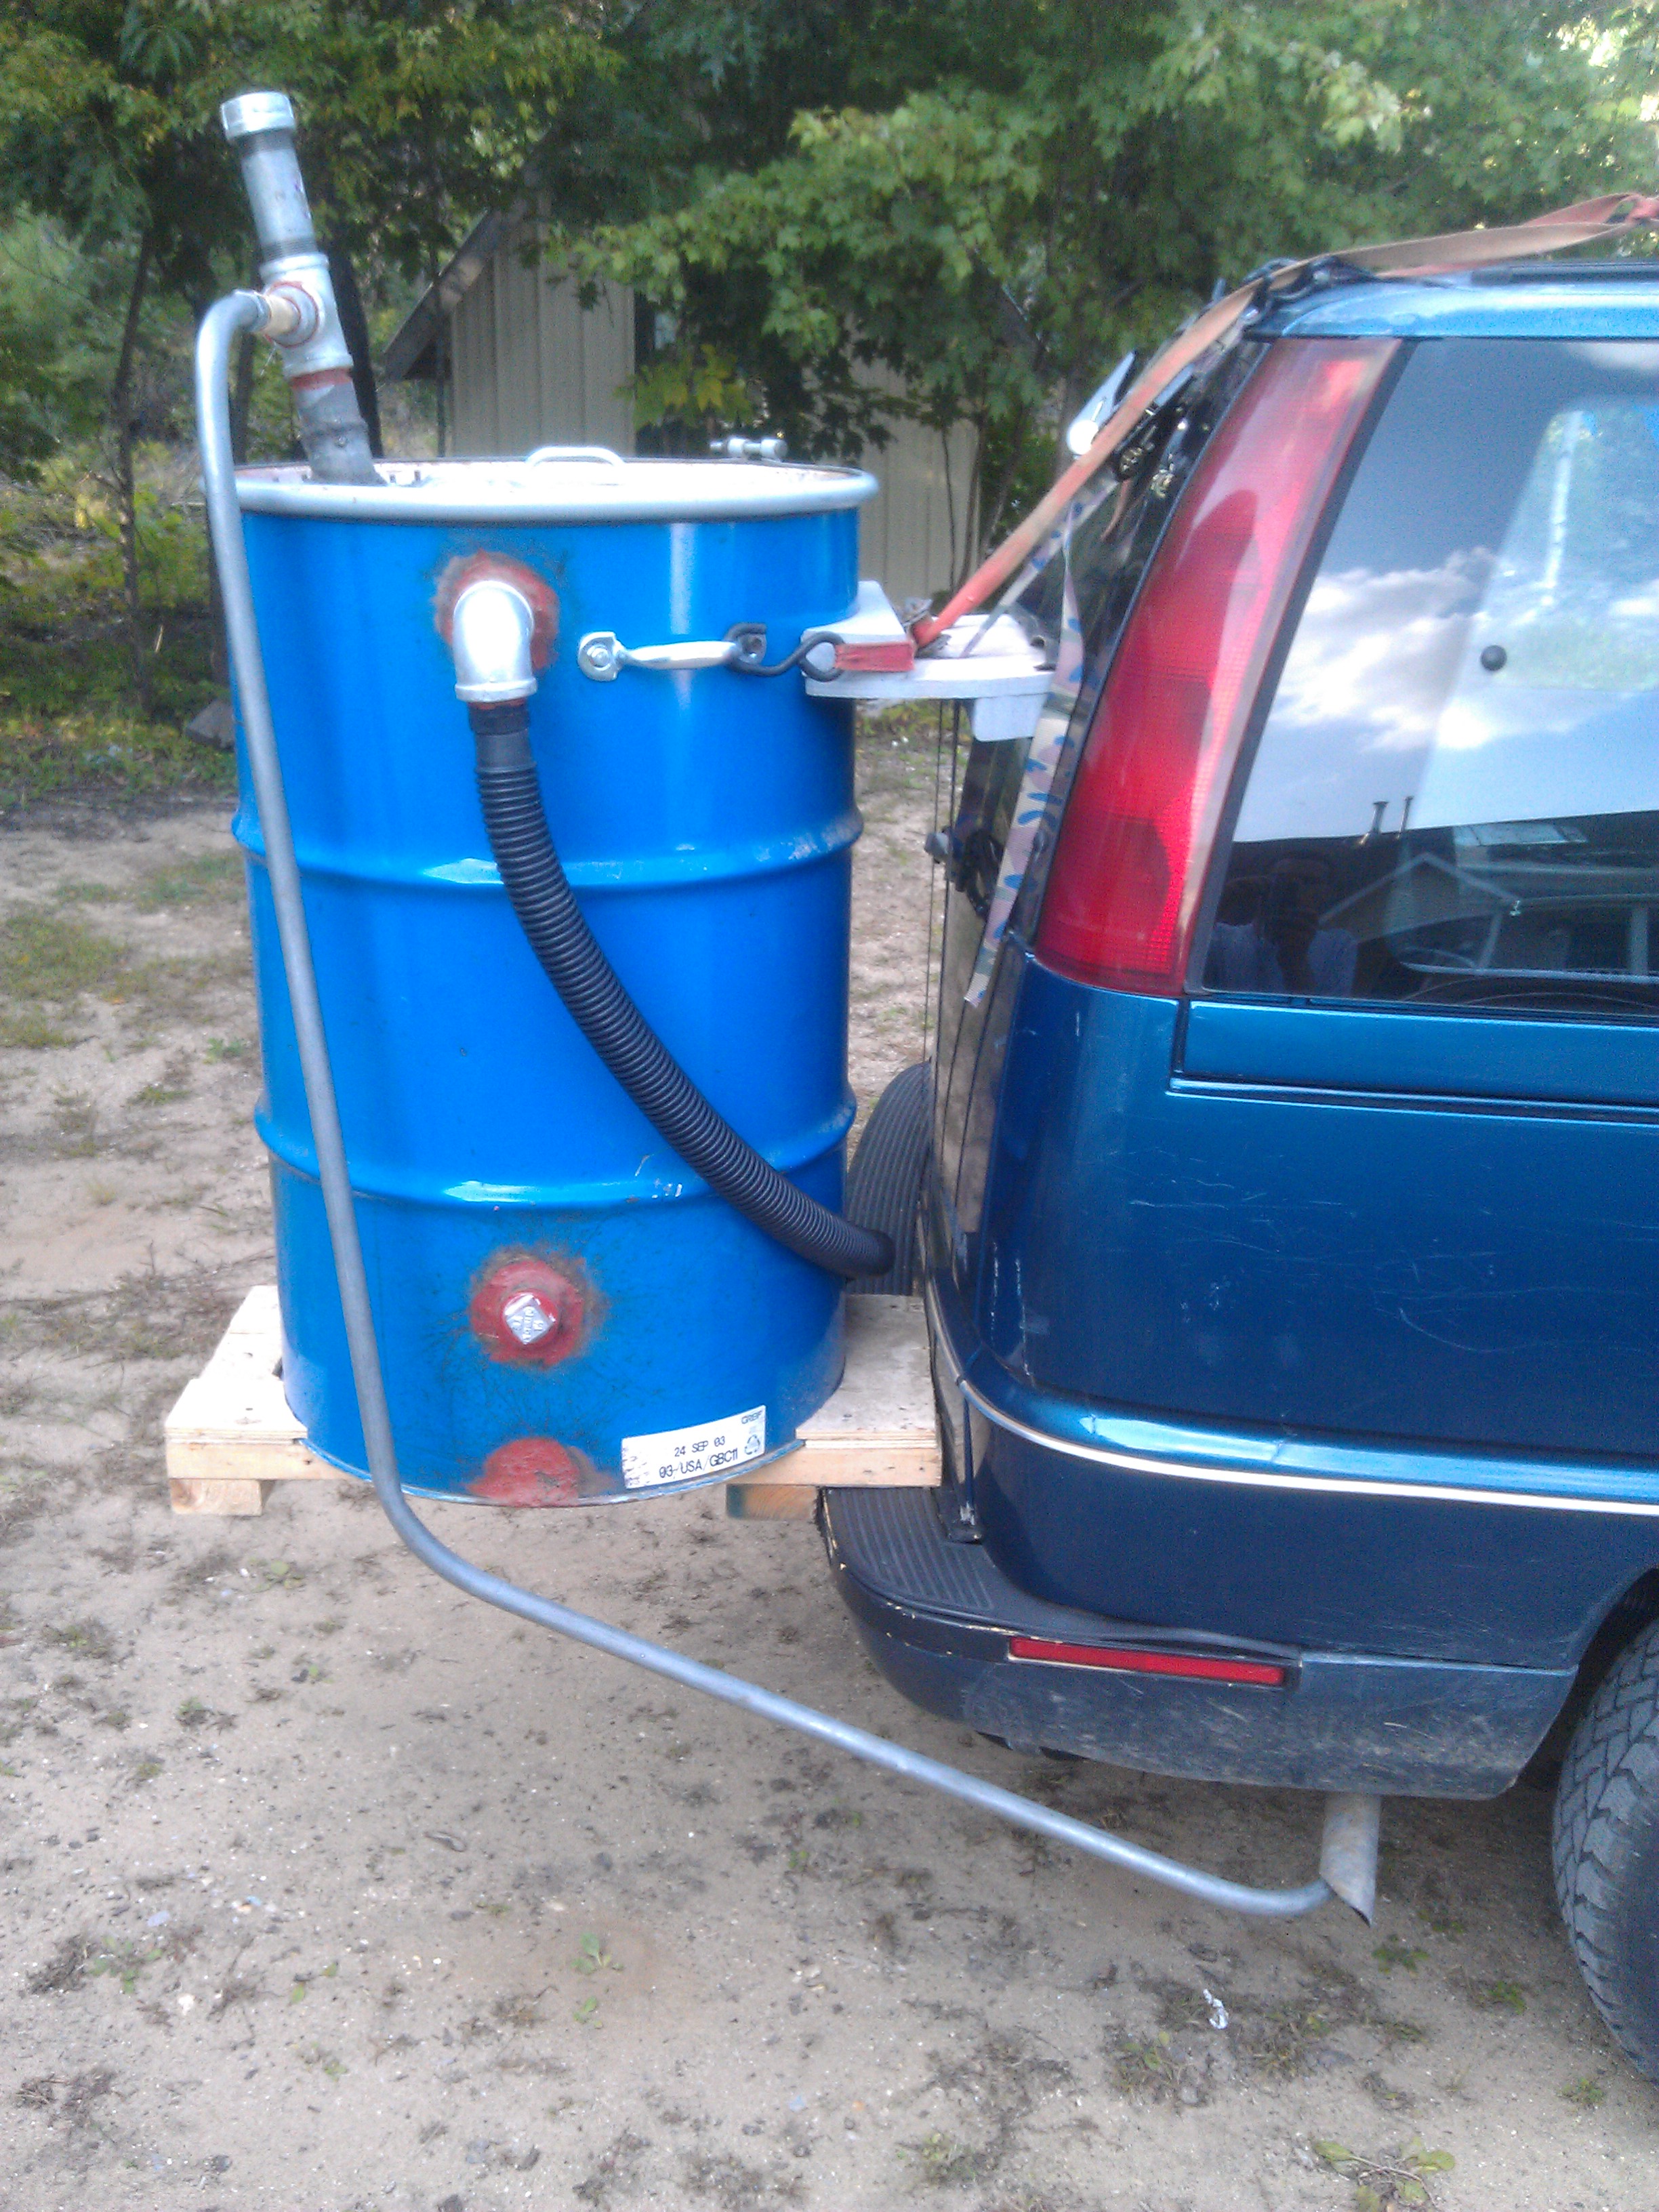
I stenciled a brief description “CHARCOAL POWERED” on this blue-barrel-thingy so people know what it is. I also coated the scorched spot with high-temp stove paint to help prevent rusting. Eventually, I may paint the whole barrel black, or maybe just the lower 2/3rds of it, where the heat is. There actually isn’t much heat when it’s operating correctly. The paint scorched when I was on a long drive, when still using a top-down air intake. The present design uses a firebrick hearth, and the barrel doesn’t get as hot now.
There is a discussion over on the driveonwood.com forum about this project that you are welcome to chime in.
Here’s a photo journal of the gasifier building process, along with some redesigning along the way. First, just a plain old burn barrel, nothing fancy:
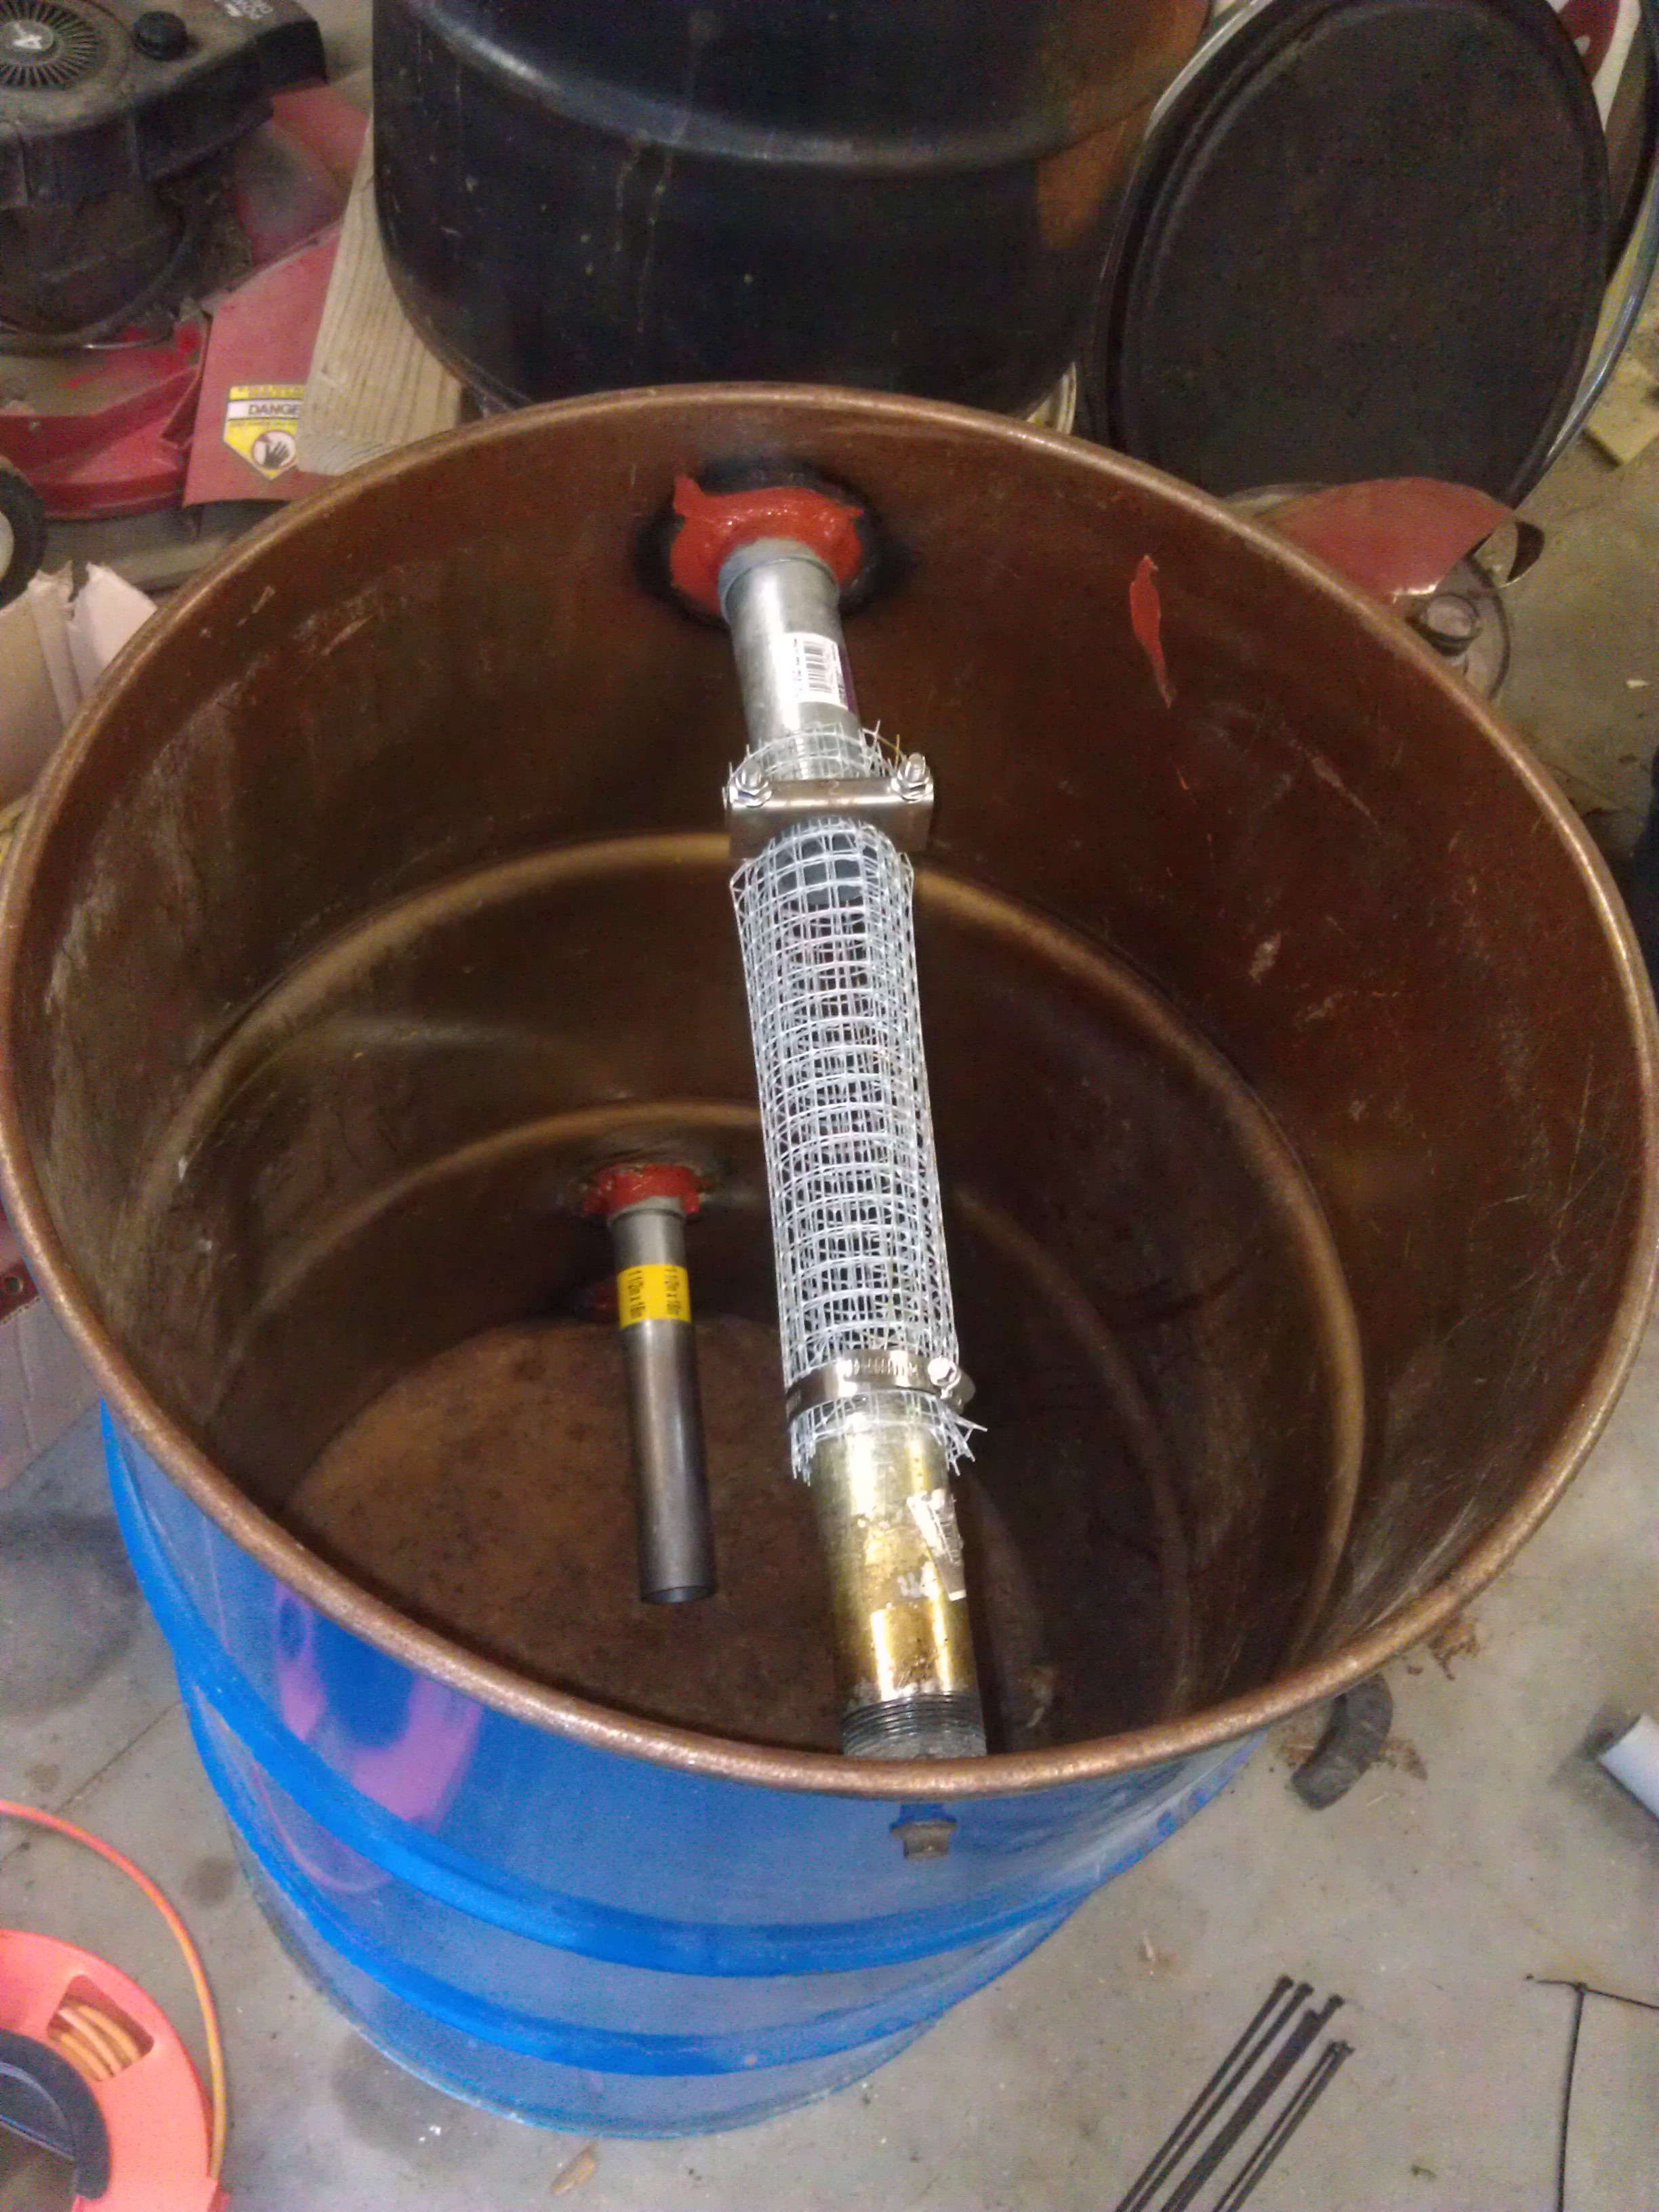
A wire mesh support for the fiberglass air filter. You can’t tell in the photo, but the end of the pipe toward the bottom of the photo where there is a bolt on the outside of the barrel, it’s welded shut, and the bolt secures the end.
The steel pipe visible toward the bottom of the barrel is an early attempt at an air intake, which I never used. I have since replaced this with a firebrick hearth. Other than the filter and the air intake, there is no other plumbing or machanism in this barrel. The barrel is a food-grade steel 55-gallon drum which originally held grape juice concentrate). It simply gets filled from top to bottom with charcoal. Air enters the bottom, gets pulled up through a small pocket of yellow-hot charcoal, and gets converted to a energy-rich vapor (carbon monoxide to be precise) and loses most of its heat in the process. The gas exits the barrel at around 120F degrees. This is not my idea, but one from a gentleman named Gary Gilmore.
The charcoal I use is not your everyday Kingsford(tm) briquettes, but home made charcoal that is produced from brush and other wood waste. (Pallets are great, they’re free and frequently made of hardwood!)
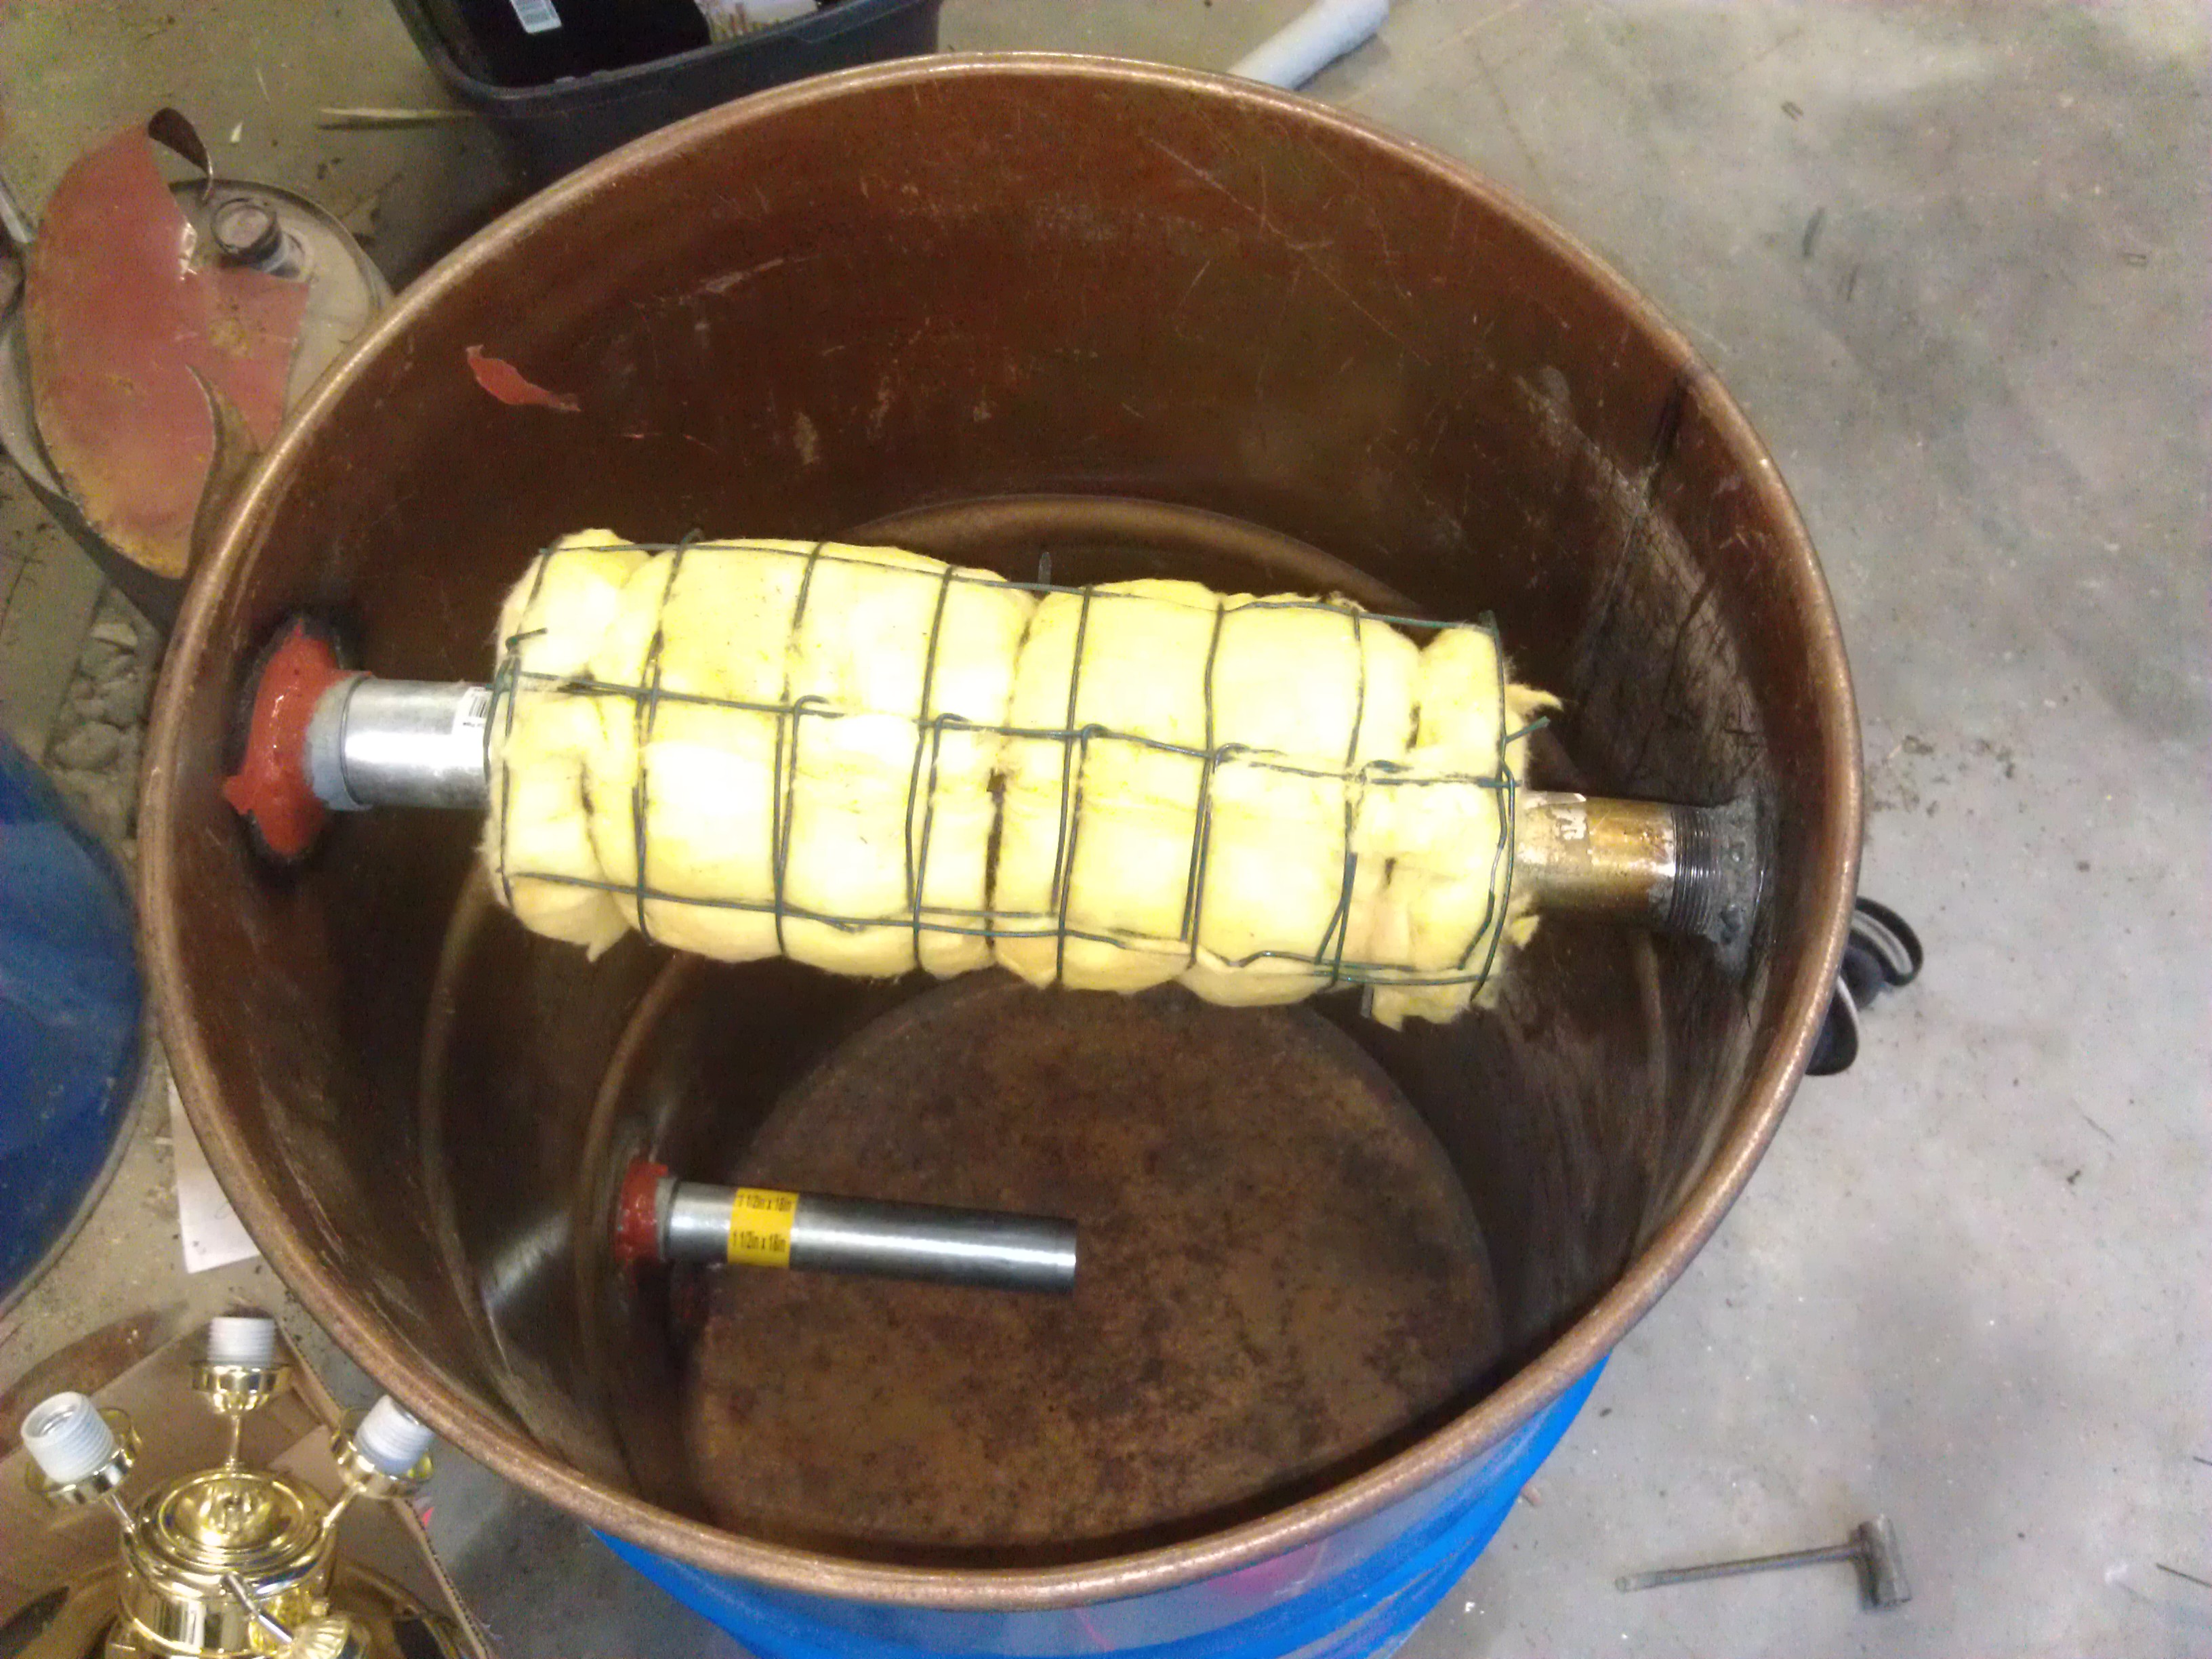
Final construction of the fiberglass filter. It is very effective. The only other filtration in the whole system is the van’s factory air filter on top of the engine. Because this is a charcoal gasifier, there is no tar, and very little water vapor. I have not had to clean or replace any filters yet.
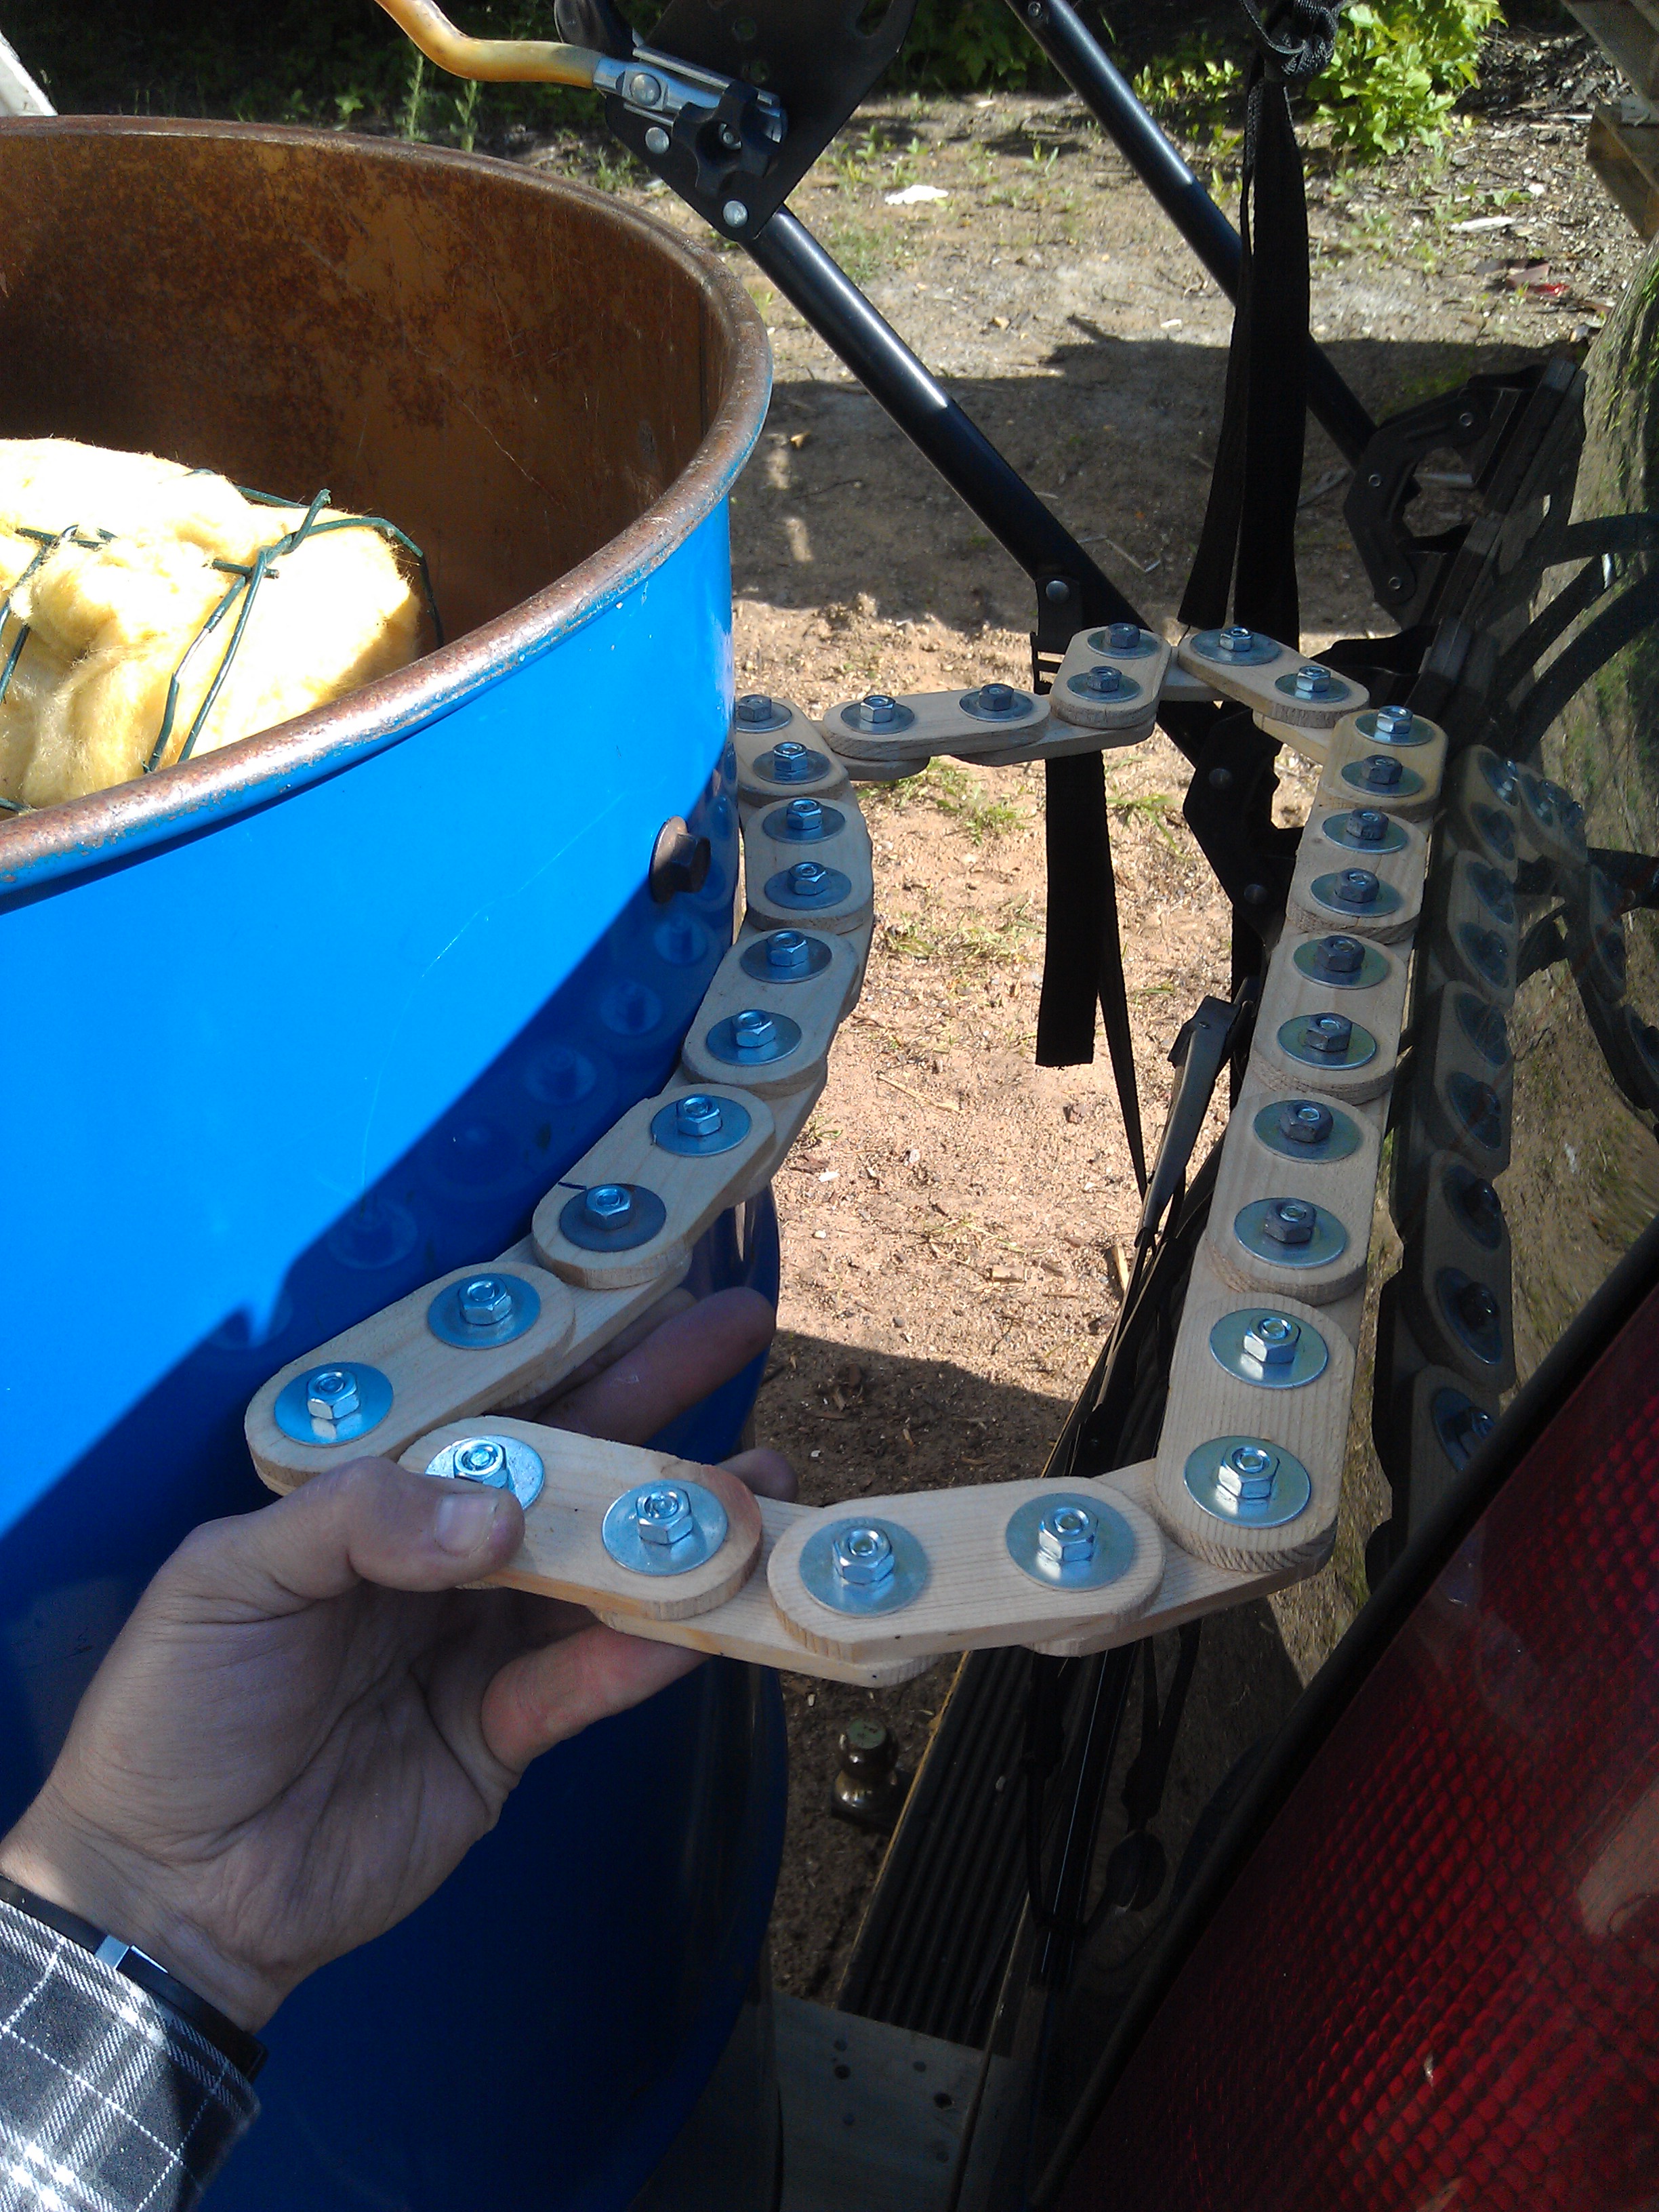
Measuring the shape (using my kayak jig links) for a mounting system (which I later abandoned). Bicycle rack is N/A as well.
An early mounting system. It did work and feel secure, but it looks quite flimsy. Part of the weight of the gasifier rests on the rear bumper, but is also supplemented by ratchet straps which go through the tailgate hatch. So a lot of the weight is ultimately resting on one of the tailgate hatch hinges. The barrel never gets very hot, but still, the wood and nylon materials don’t seem appropriate. I was not happy with it, and have since upgraded.
This shows an early mounting system, and the top-down air intake, both of which I have upgraded. I went to a uni-strut mounting system, in which two 5-foot long rails of uni-strut go through the tailgate and are secured to some seat mount fittings (which I perceive to be quite strong, as the seat belts are integrated into the seats).
I have also changed the top-down air intake (which is an idea from Kalle’s charcoal gasifier) to the lower, side mounted air intake. Both types inject air into the bottom of the charcoal bed, but the top-down style was made of a steel pipe which very quickly burned away. I replaced this with a firebrick hearth design which draws air from the side (where you see the square plug).
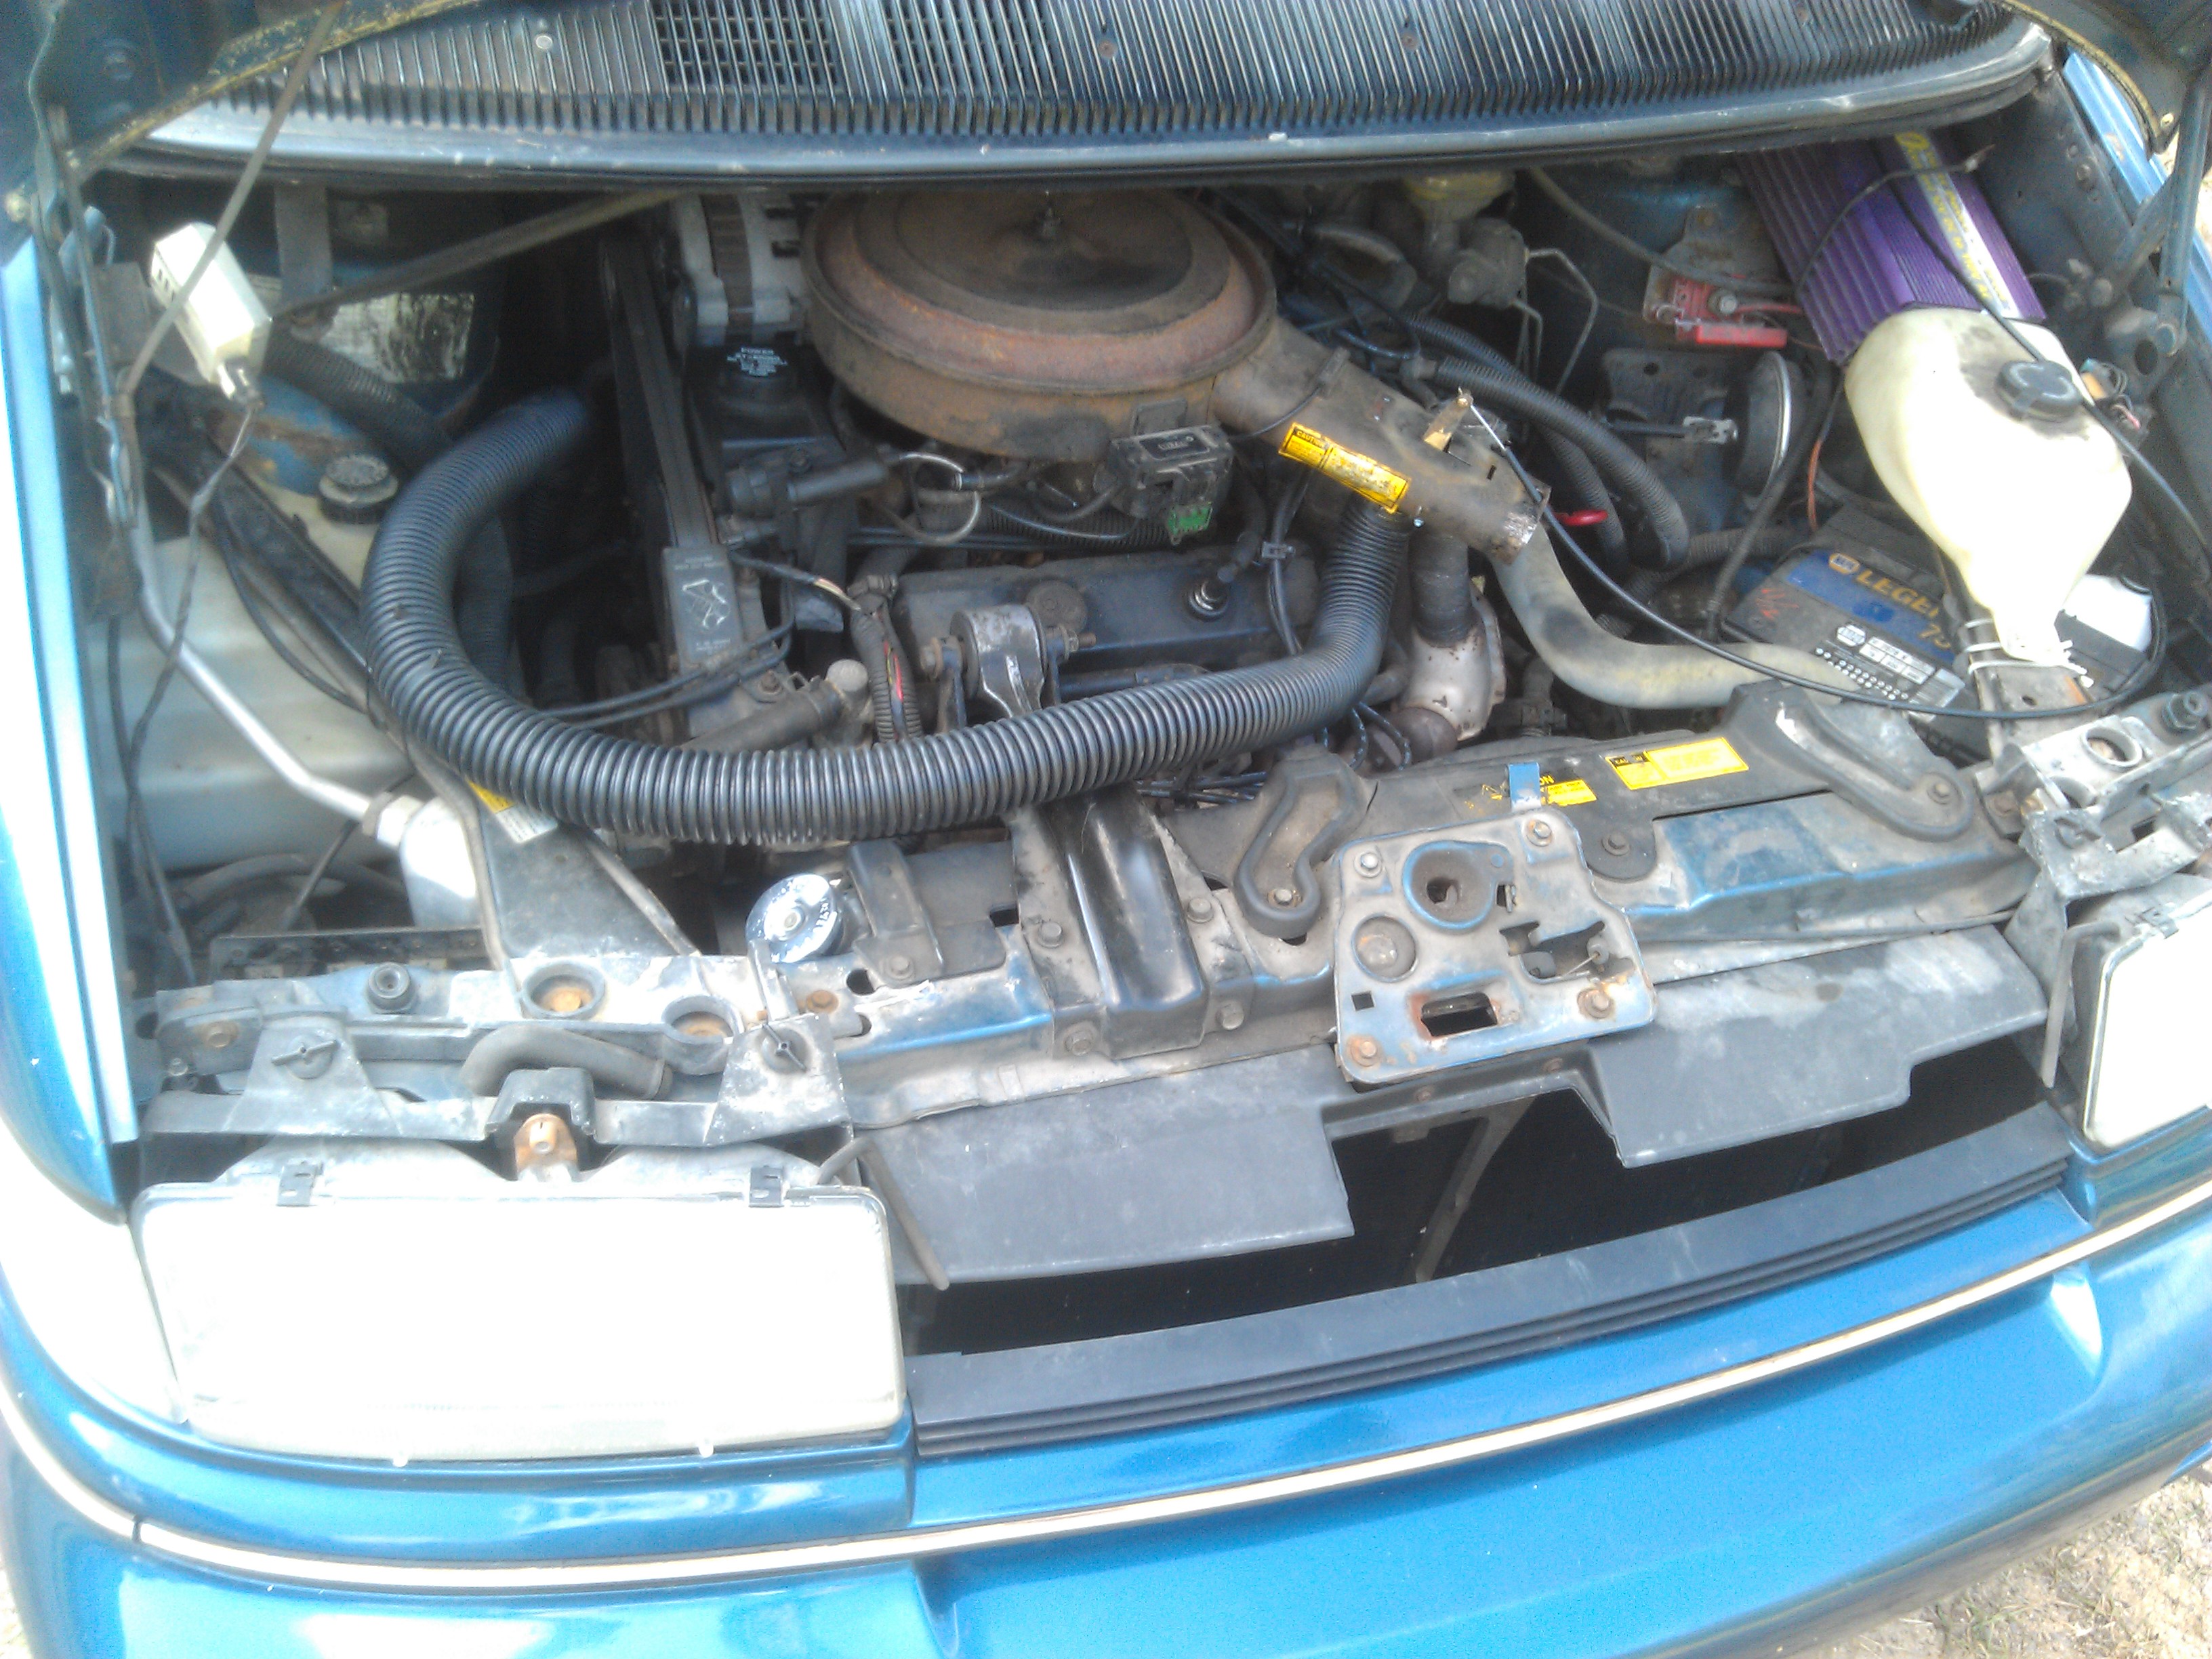
The gas intake. It’s a 1-1/2 inch plastic sewer hose. I zip-tied it here and there to secure it in place. There is not much room in the engine compartment so it was challenging to route this hose and connect it to the engine. It might look sloppy but it works very well.
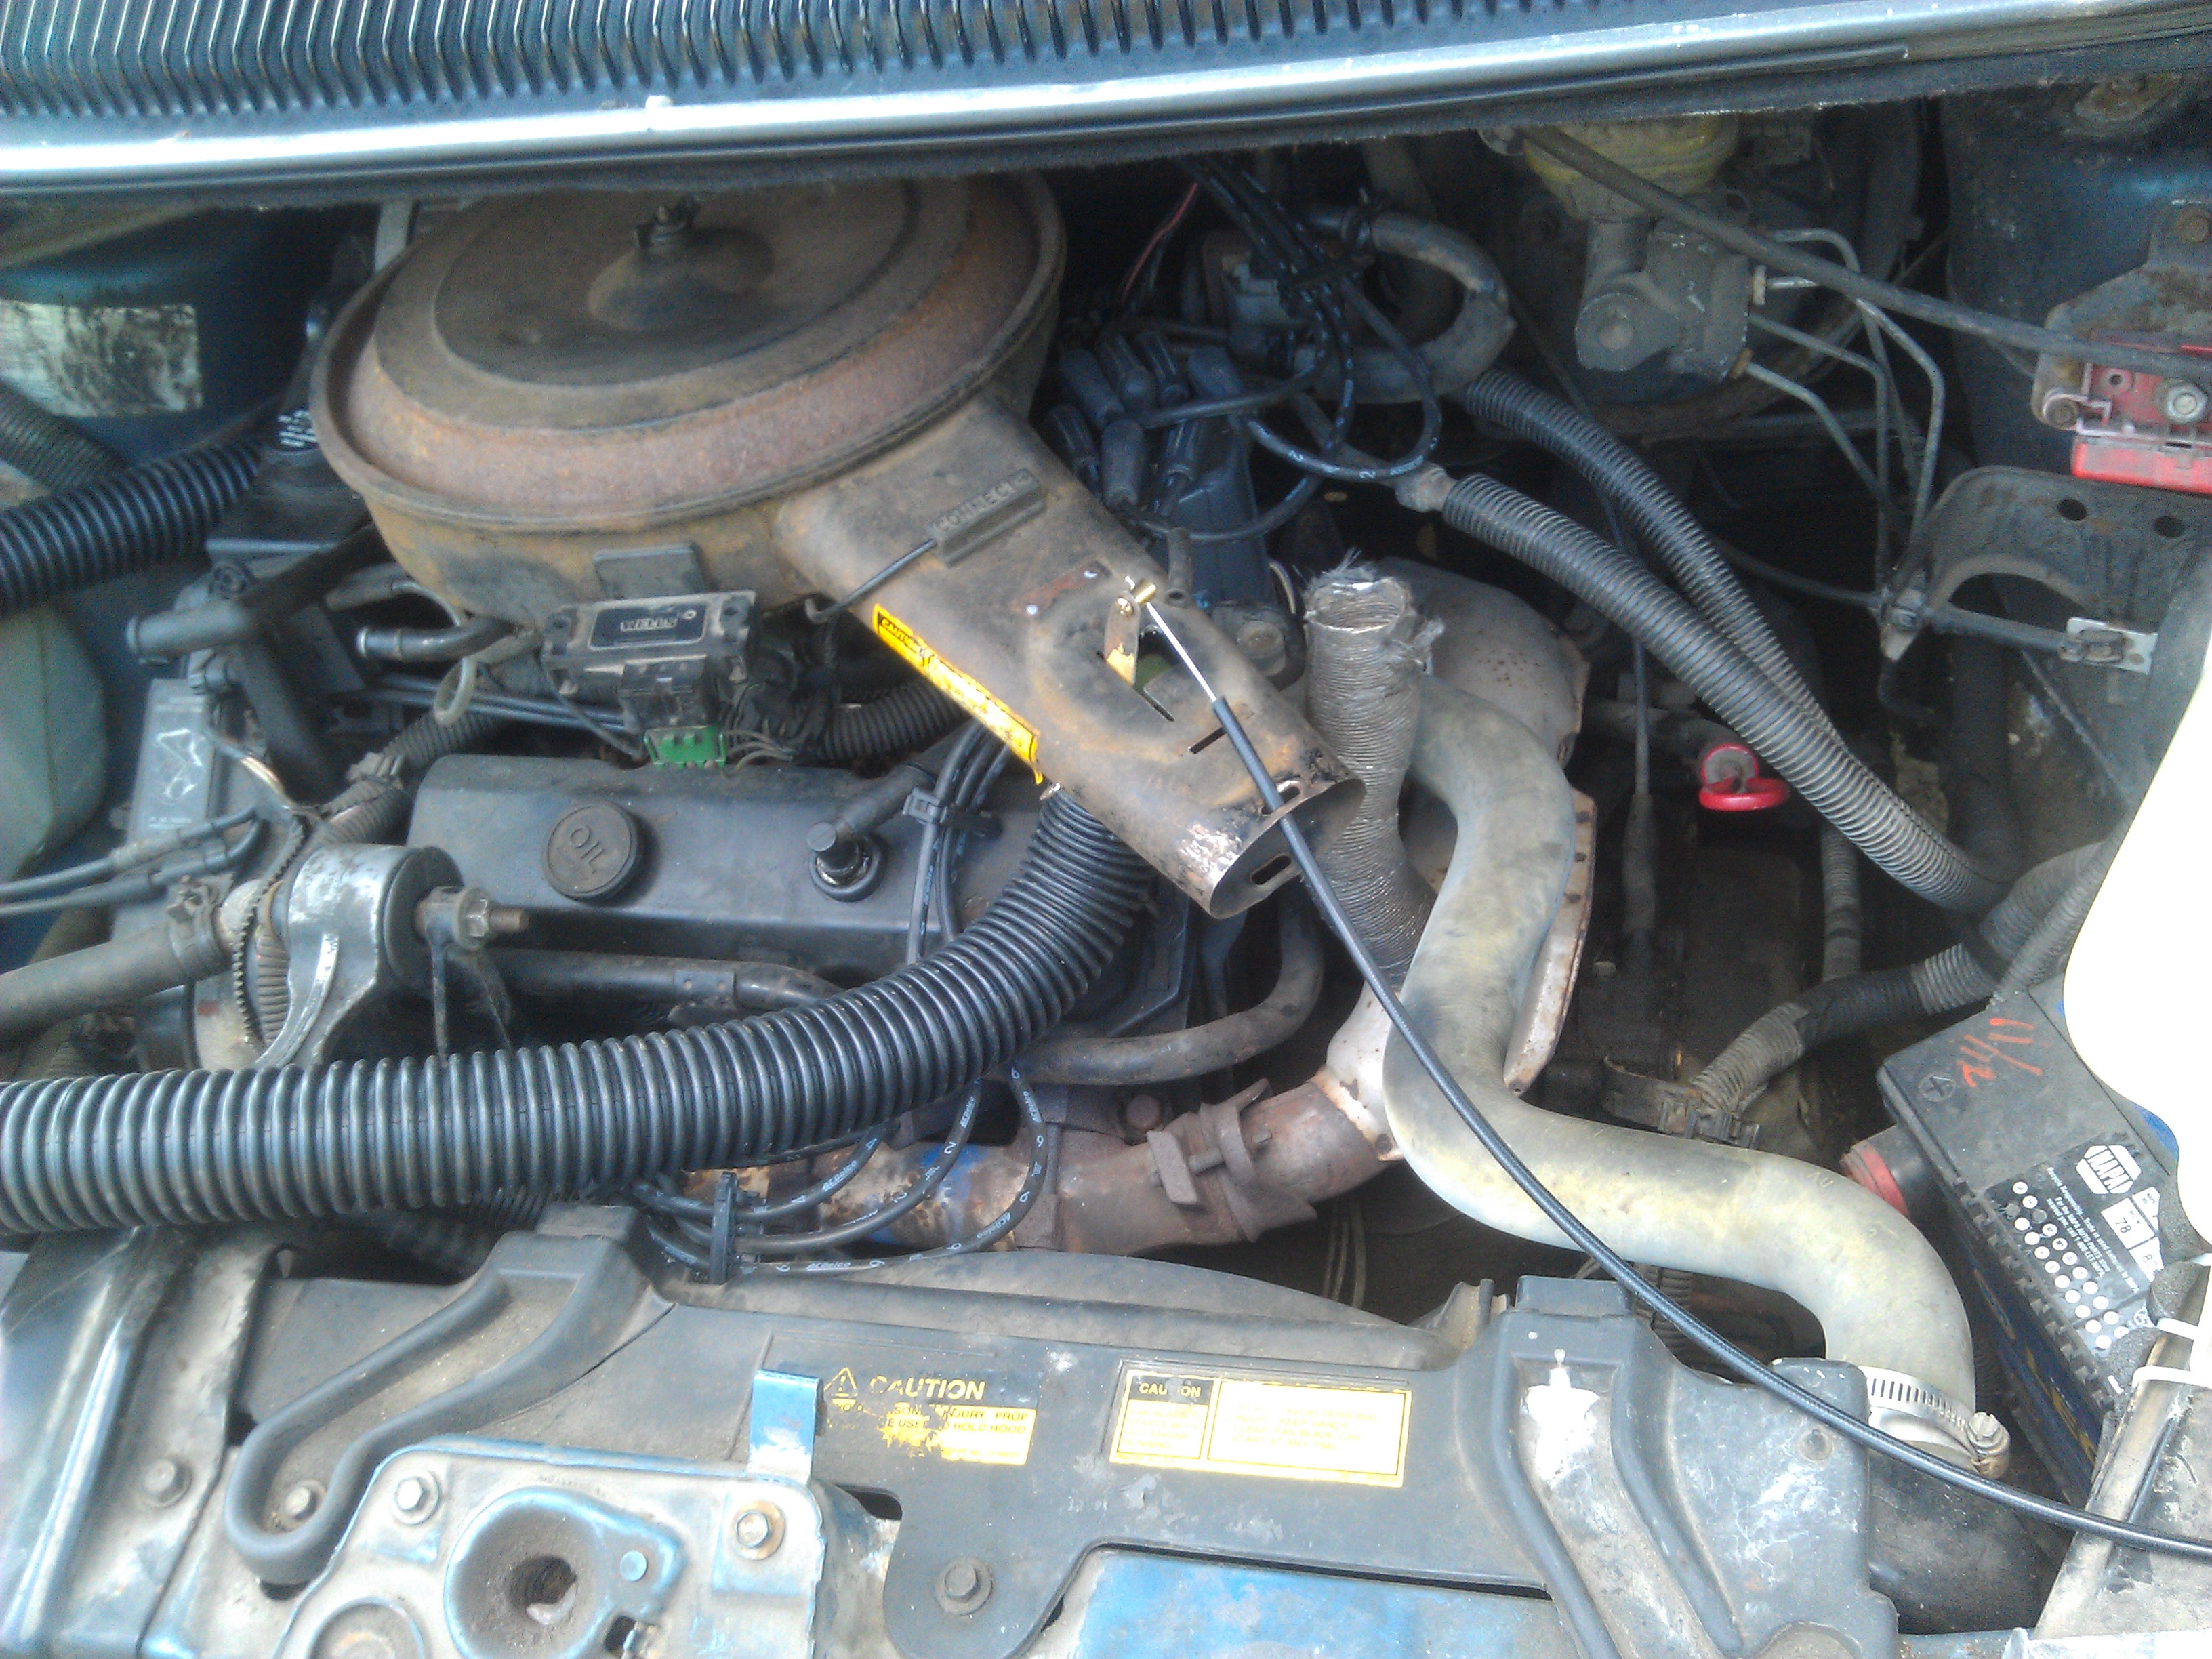
A close-up of the air-gas mixture control. The plastic sewer hose comes up into the original heat-stove inlet, which still has the original butterfly. I removed the heat-stove vacuum actuator and connected a manual choke cable in its place, so I can control the air mixture. It works very well, but I think the sewer hose has a lot of flow resistance. I plan to improve this design. Notice also the old-style distributor. I will eventually modify this to allow manual adjustment of timing. The van lacks power at higher revs, which makes the automatic transmission misbehave a little, but still drives amazingly well.
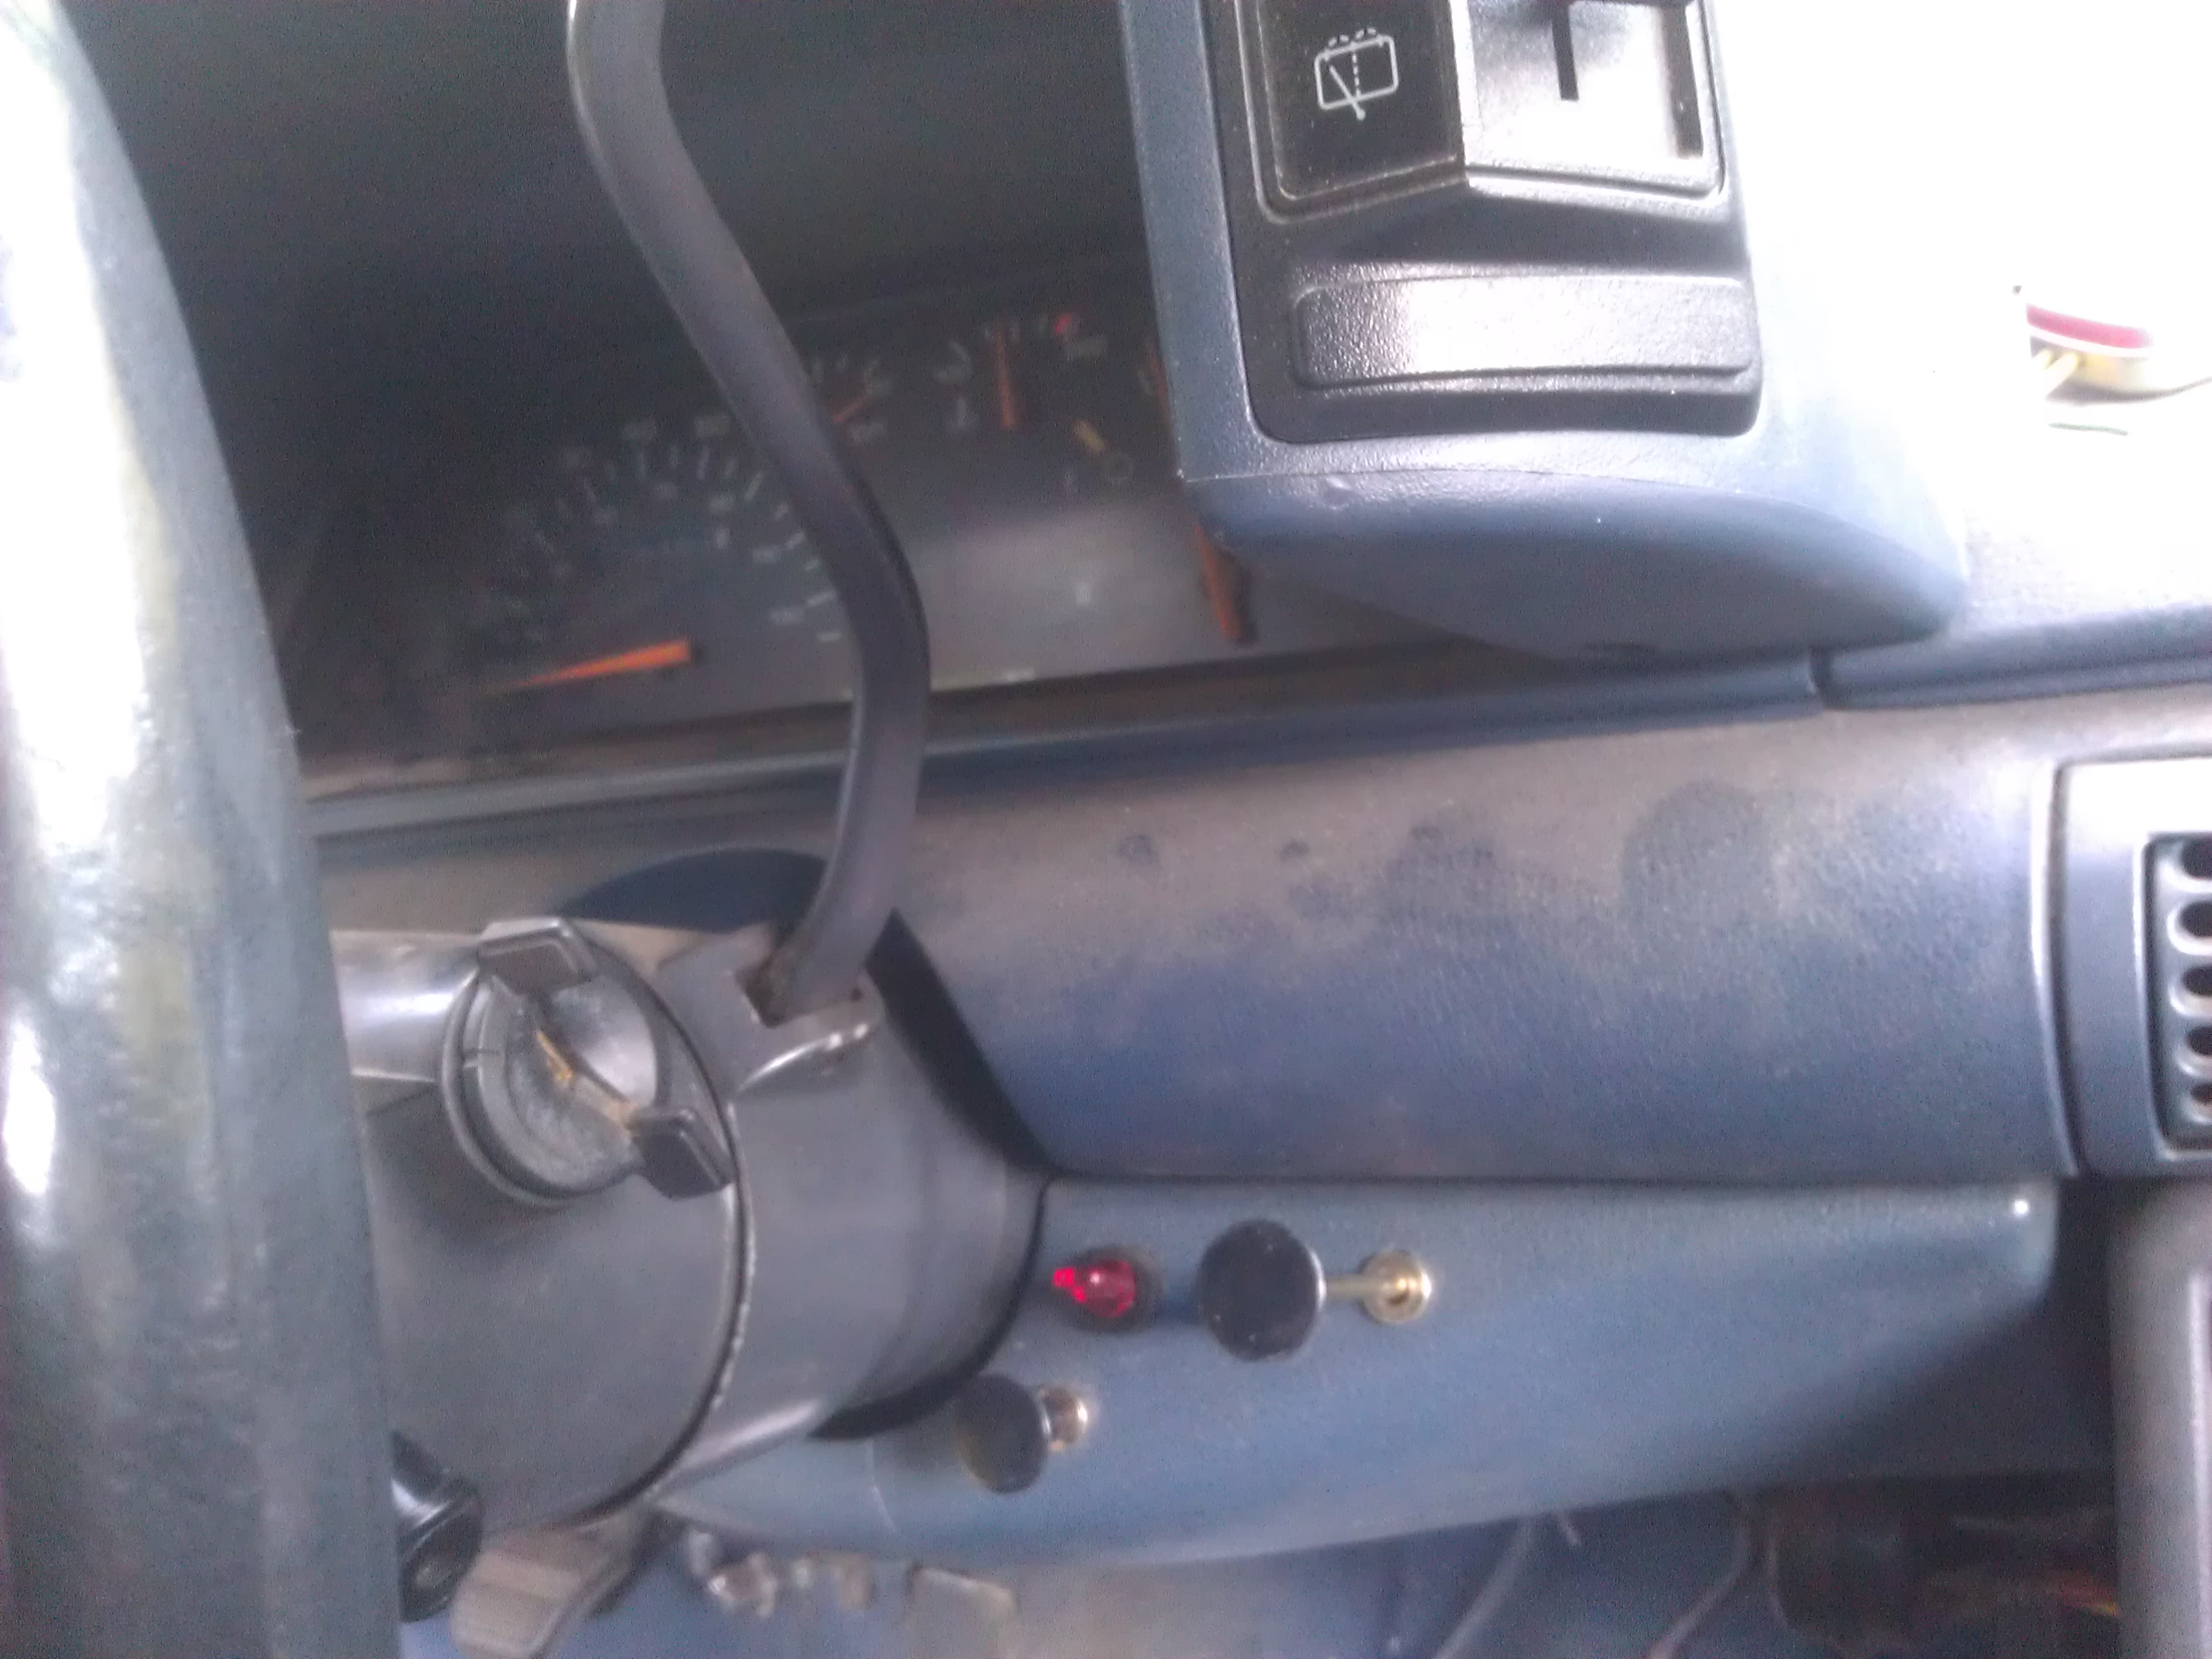
The controls, on the dash of the van. The left-most knob is for timing adjustment. It’s not connected yet. The red switch above and to the right of that, is the fuel pump. I start the van on gasoline and idle it to provide suction to get the gasifier warmed up, then I shut this off to run on pure charcoal. The right knob is for fuel-air mixture, which seems very sensitive. Most of the time I pull it all the way out, but I tend to drive with my hand on it, and feather it this way and that to get just the right mixture. I’m thinking of how I can integrate mixture control with the engine’s ECU so that the oxygen sensor can help automate the tweaking of this knob. Perhaps something that reads the PWM signal from the TBI injectors.
I can switch from charcoal back to gasoline and back to charcoal by manipulating these switches, all while rolling down the road. This is a good thing because the van lacks power to climb hills of any steepness, and if stopped idling at a traffic light very long, can be slow to accelerate. An interesting mode of operating also is with the fuel pump on, but the gas mixture knob partway out. The van’s ECM correctly reads the oxygen sensor, detects the richer mixture, and dials back the gasoline going through the TBI injectors.
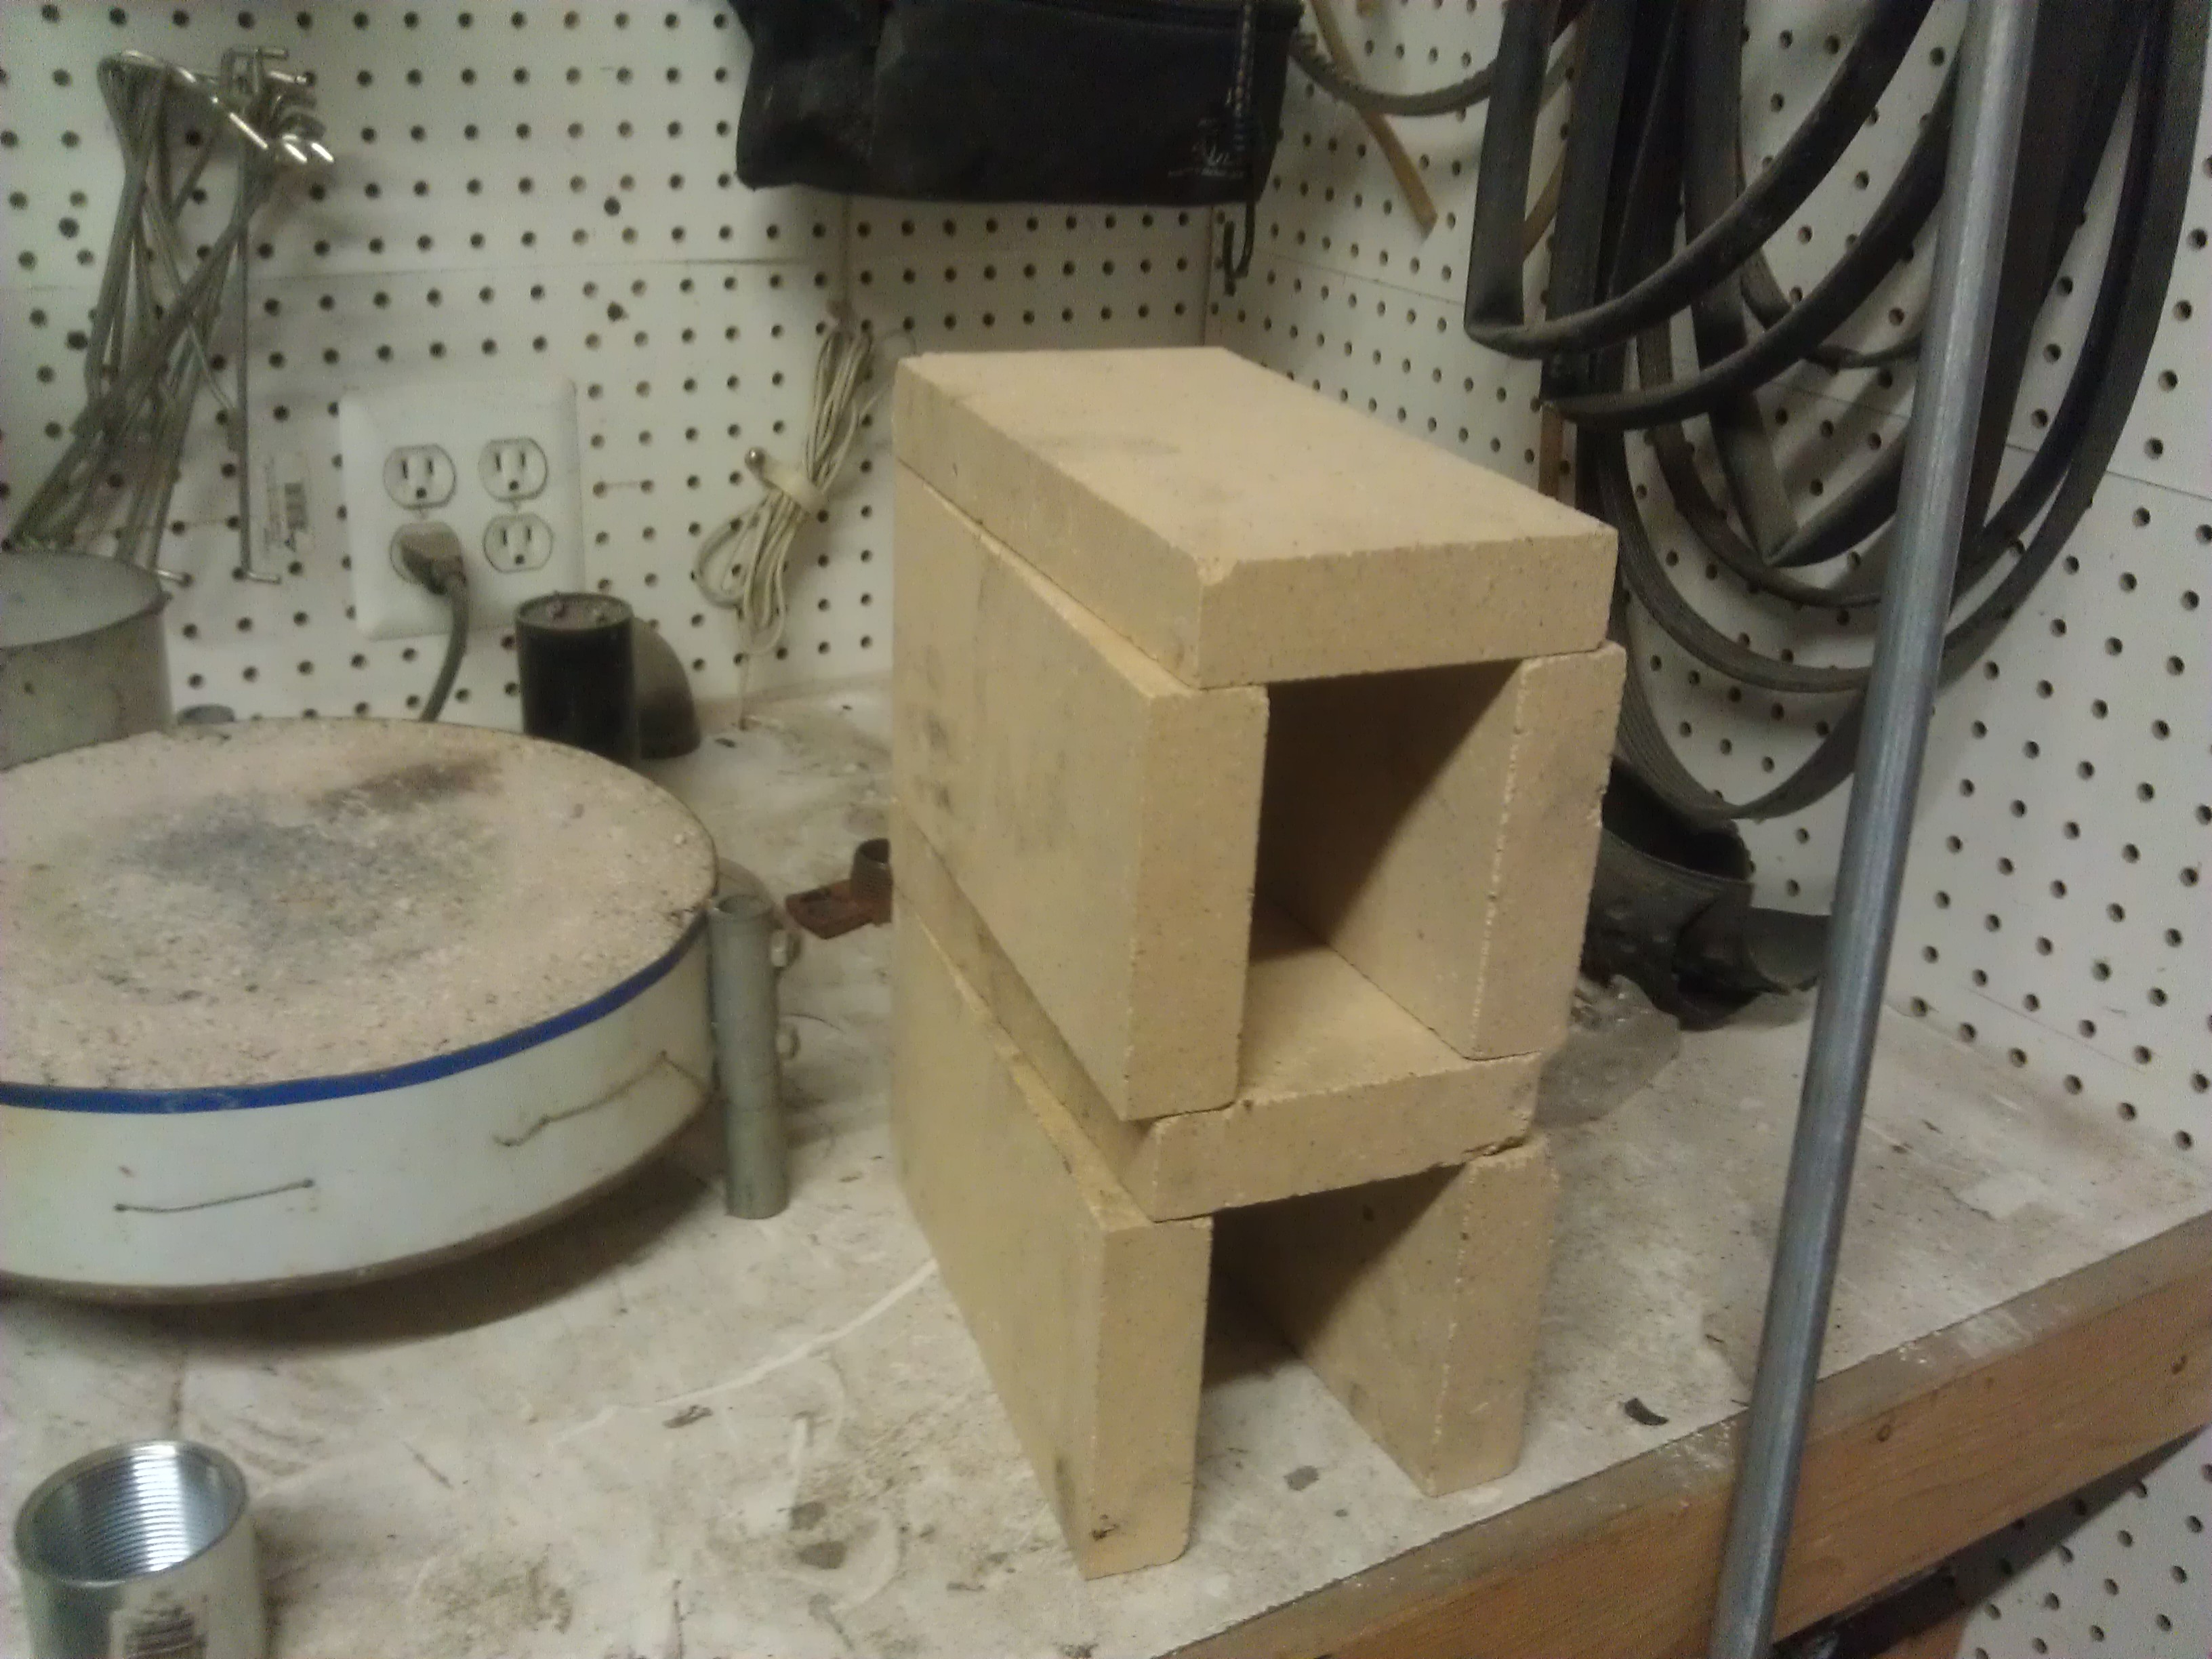
A mockup during construction of the firebrick hearth. I originally had a steel pipe with the mesh-reinforced mortar tip, similar to the way I did for my lawn tractor. But the pipe deteriorated after only a few drives, so I switched to this. So far the firebrick hearth is much better. The hearth is secured into the gasifier with high-temp silicone rtv, and the air enters through the top chamber. The bottom two firebricks don’t do anything but prop up the hearth from the bottom of the barrel. This actually was changed to the firebrick being laid down flat, to prop the hearth up to the correct height to match the air intake fitting.
The round object to the left is not part of the charcoal system, but rather a base for an aluminum melting furnace.

Here you can see the air intake, EGR valve and pipe going to the tailpipe, and the gas outlet pipe. The top part is hard galvanized pipe, and then about a foot down it gets a piece of stainless flex hose (coated in black electrical tape to help seal air leaks) and then right under the bumper it changes to 1-1/2″ plastic sewer hose. This hose is not quite large enough. The van lacks power for hills and I will eventually replace this with a larger hose (or add a second one).
The photo also shows the uni-strut mounting system. I had to cut two little square holes in the composite tailgate (oh, noes!) to accomodate the uni-strut. But it is a very solid mounting, does not creak or rattle, is made of steel, etc etc.
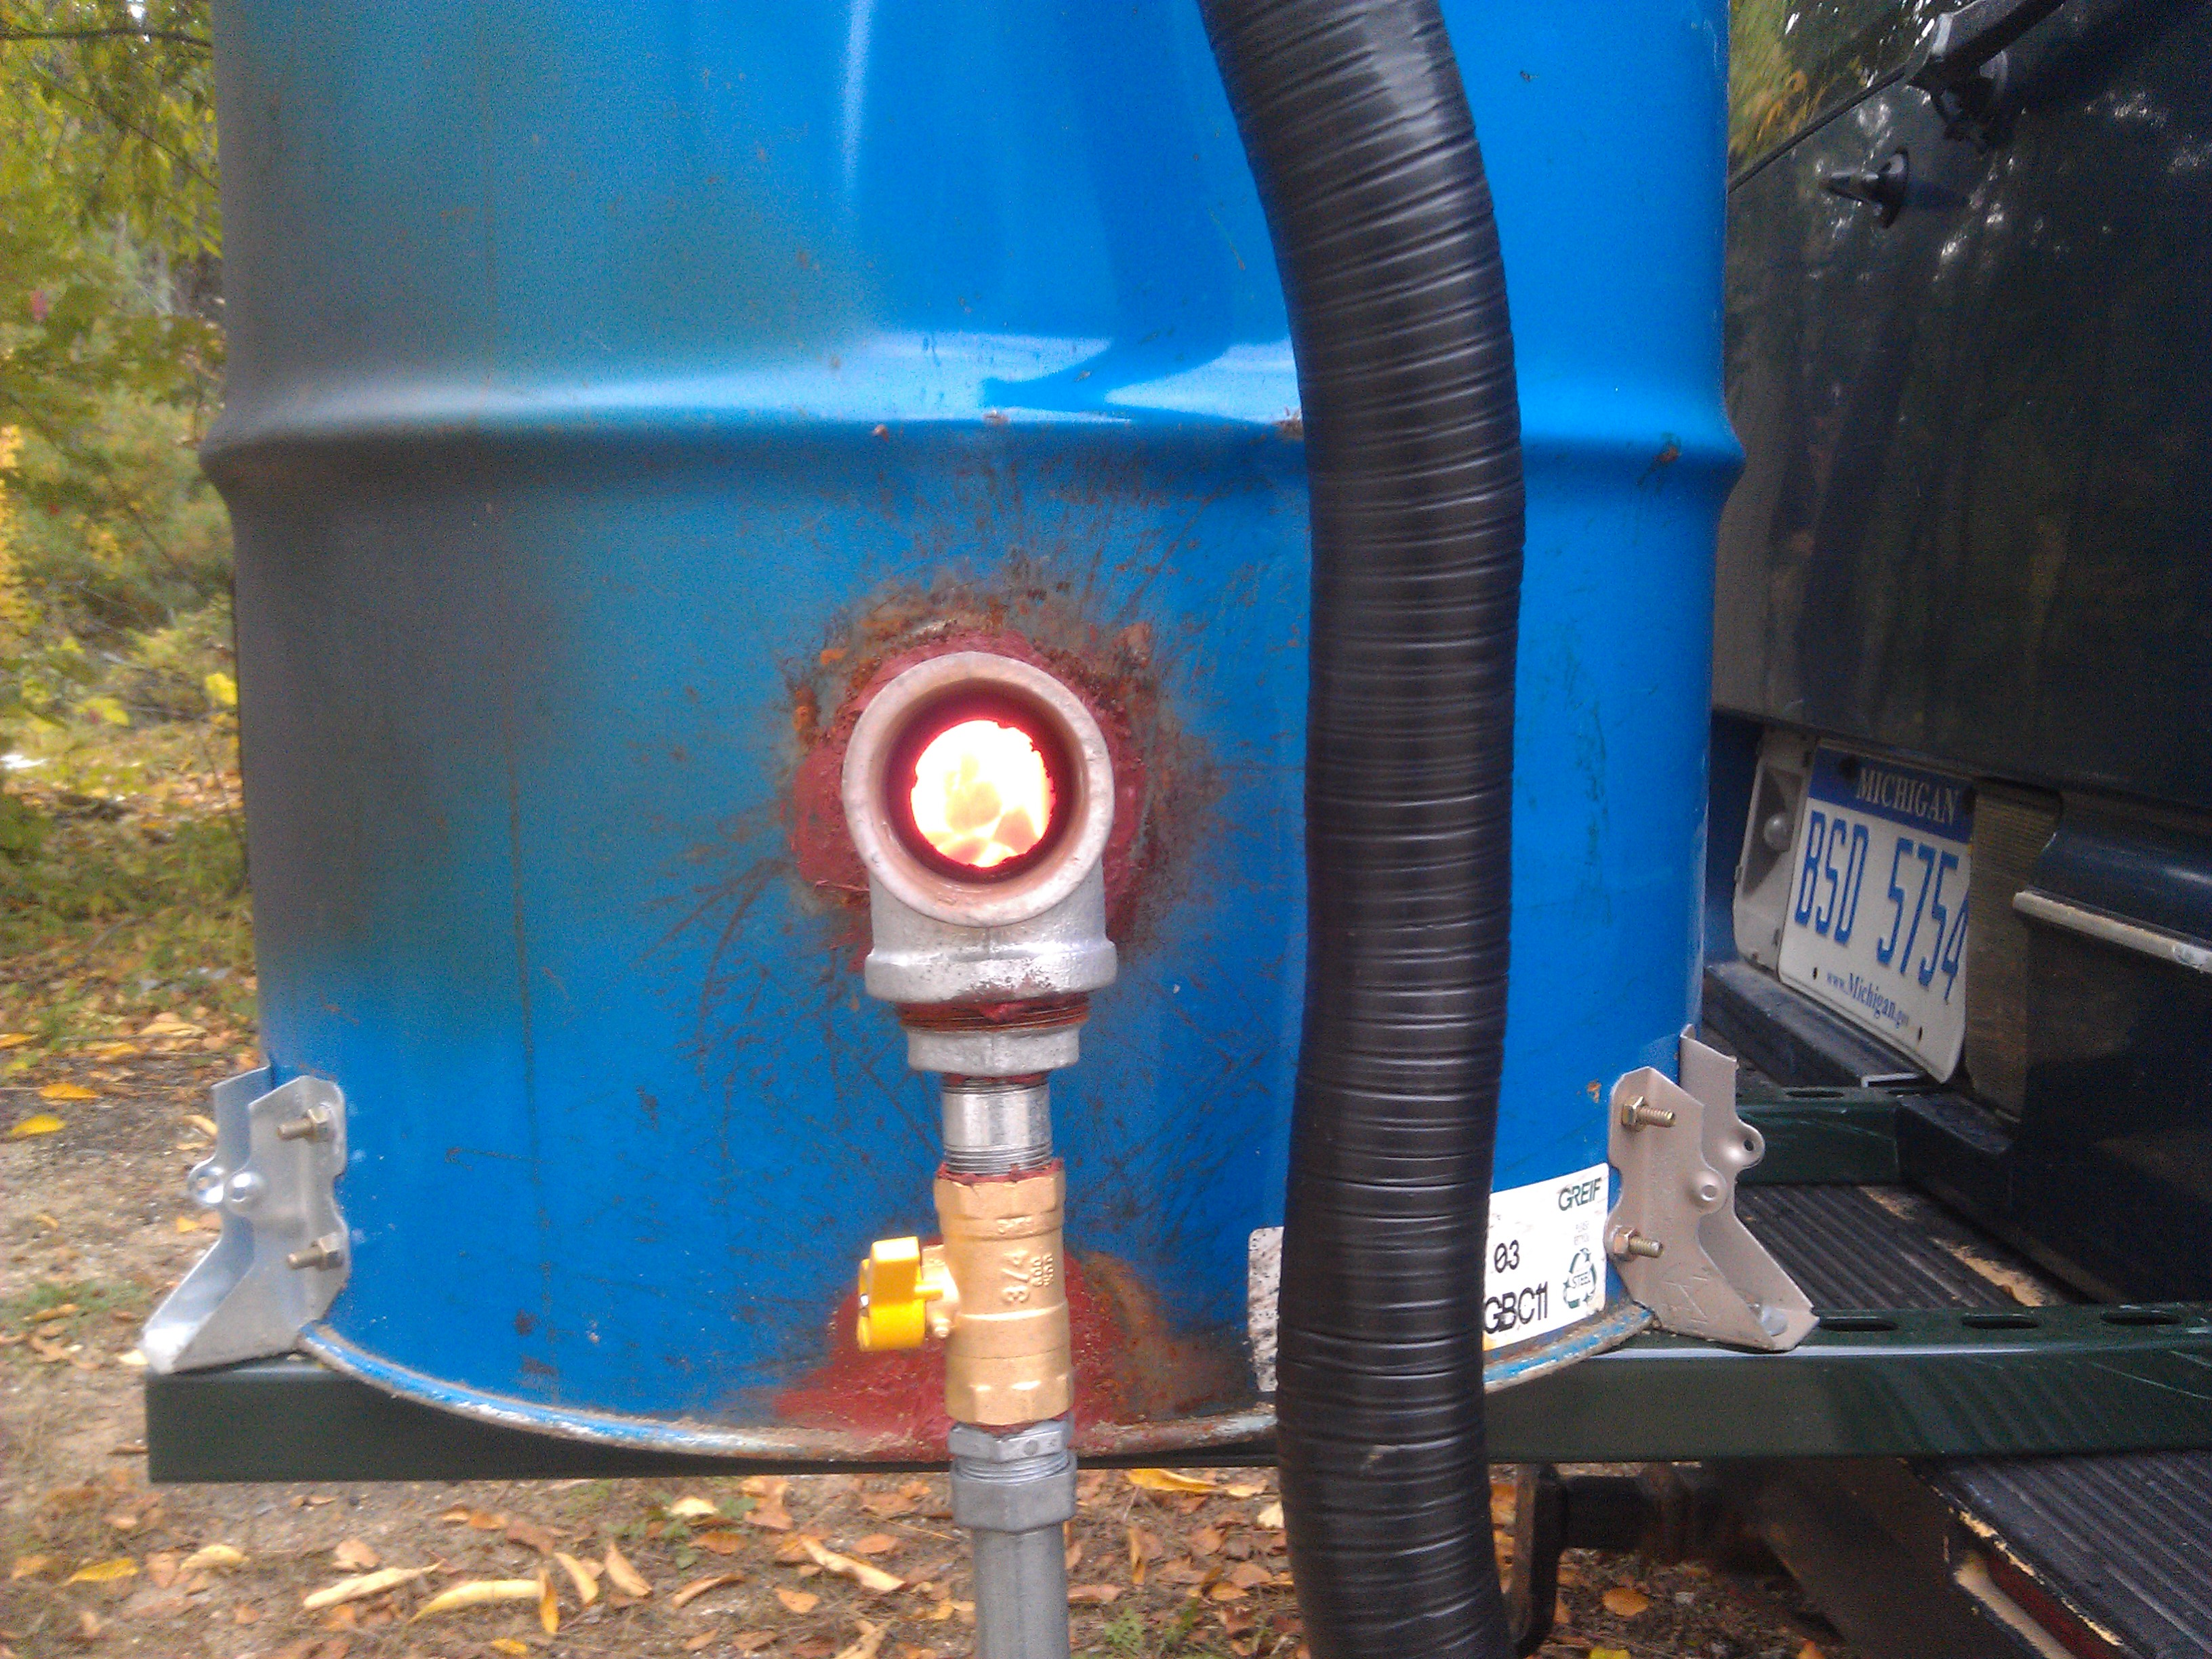 Here’s the air intake. The fire was not as bright as the picture shows, which is a good thing! The EGR (exhaust gas recirculation) parts are working correctly. Pardon my sloppy welding job. I had to patch it up with red silicone, which worked fine and dandy, no problems at all there. One thing I thought later about the silicone I used: Is it oxygen sensor safe? It said nothing about sensors on the tube, but I used that red stuff you get in a calk tube that’s intended for wood stoves and fireplaces. So the jury is still out on that. I need to drive a few more miles to know for sure. So far it runs fine, no trouble at all when switching back to gasoline and having ECU mixture control.