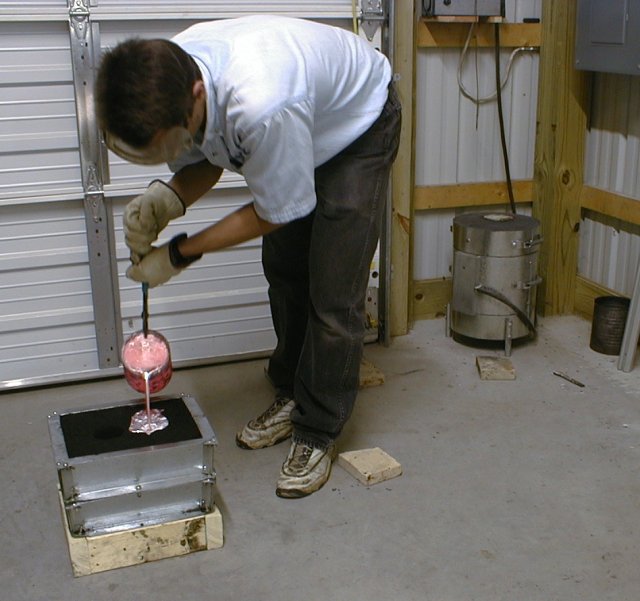
Pouring a sand casting
Here we are pouring a sand casting for the Gingery Lathe I am working
on. It is the head stock casting, note the 2×4 box built to extend the
drag portion of the mold. The crucible was quite full, and when
beginning the pour, the metal was a little difficult to aim squarely at
the mold’s pouring cup (note the metal splash).Click the picture and PLEASE NOTE! The person in this picture is CRAZY! (Oh, wait a minute…that’s me!) DISCLAIMER: I assume no responsibility for damages caused by the use or misuse of the information on this web page or site! Another thing I noted was that the metal was just a touch on the warm side, so the casting had some minor sand inclusions.
Originally based on Dave Gingery’s book, my new furnace can hardly be
called Bertha. I have made many improvements to the design. Please
check it out.You can also download complete plans and detailed drawings of my Improved Electric Radiant Shop Furnace for a small fee!
 Homebuilt electric melting furnace
This is a typical scene just before pouring. Note how brightly the
crucible is glowing. The metal was too hot to pour right away, so I set
the crucible down on a firebrick for a minute or two so it could cool a
bit.In the background is the Lil’ Bertha, the lid (left) and
the dross can and skimmer (right). Note also the closed overhead door.
That’s right, foundry work–indoors!Note:
When I melt down scrap to refine it into ingots, it is often painted or
has other impurities in it, which results in a LOT of smoke. Then I
move the foundry just outside for better ventilation.
 Waiting for the crucible to cool a bit before pouring
As you can see, the crucible has cooled considerably. The metal is just
the right temperature for the particular casting I am making here. When
the metal is the correct temperature, it fills the mold completely
(obviously) before solidifying, yet it is not so hot that the surface
is dulled.
 Doing another pour, FUN!
Too much molten metal is always better than not enough. If there is not
enough metal to completely fill the mold, the casting may have
shrinkage, or worse, not be completely formed!This is an
ordinary muffin tin, normally for kitchen use. Of course, nothing
around here is normal. I also pour refined scrap into ingots using this
tin, so that I have a reserve of clean metal to melt indoors on winter
or rainy days.
 Pouring excess into muffin tin
The castings just poured here were not very thick so I was able to begin shaking them out of the sand in just a few minutes.
 Starting to shake out the castings
These are parts for the homebuilt lathe, as described in the book by Dave Gingery, “2. The Metal Lathe.”Click
the picture or its link to see more castings from the home shop
foundry! You’ll find an auto grille, dremel router attachment, lost
foam castings, and more!Note: In the picture, the smaller
casting with only one sprue I had to re-melt and pour again, with the
sprue in a different location because of a shrinkage cavity right
around the sprue.
 Look at those castings gleam
All those rock hard chunks of scorched sand easily become re-usable
with a little work with the hoe. A wheelbarrow is just the right size
for 10-15 gallons of sand. (I have 2 five-gallon pails of sand, when
it’s lightly rammed into the pails.)With a home shop foundry, a
great deal of creativity and ingenuity (C&I) can be expressed! It’s
straightforward and simple, requiring no more complicated tools or
skills than woodworking.Just in case that sounds too simple,
please to come to reality on a two (or maybe more) things. First, it
takes some time to do this stuff, and patience is required. Second,
there can be hidden costs that come to light, where you thought it was
cheaper to build than to buy!
Once you’ve established the practicalities of any hobby, it becomes an excellent expression of creativity!
 Reconditioning the used sand